
Basil is a favorite herb among gardeners. Kinds of pasta, pizzas, sauces, and pesto all benefit from the fiery clove taste. It prefers sun and should not be planted outdoors until late spring when the chance of frost has passed.
How to Grow Basil from Cutting? The Basil can be grown in three steps: Taking the Cuttings of the Basil, Rooting the Cuttings, and Transplanting the Cuttings. Look for a garden bed or a place on the patio where the basil plants can enjoy approximately eight hours of much-needed direct sunlight-tight per day before deciding where to plant them.
Taking cuttings is the easiest way to cultivate Basil during the growing season, which is typically spring, summer, and autumn. When flowering plants are close to the end of their growth period, Flowering plants are nearing the end of their growth period, take cuttings from plants that are not flowering.
It is that simple. Everything you ever needed to know about Basil and then all the things you didn’t realise you needed to know about Basil are here. This includes how to succeed in water or soil and how to transplant your new cuttings safely.
Steps on How to Grow Basil Cutting
Taking Cuttings
Take your cuttings from an outdoor flowering basil plant. Using a cut basil leaf from the grocery store’s produce department is less effective because they are not necessarily new enough to root.
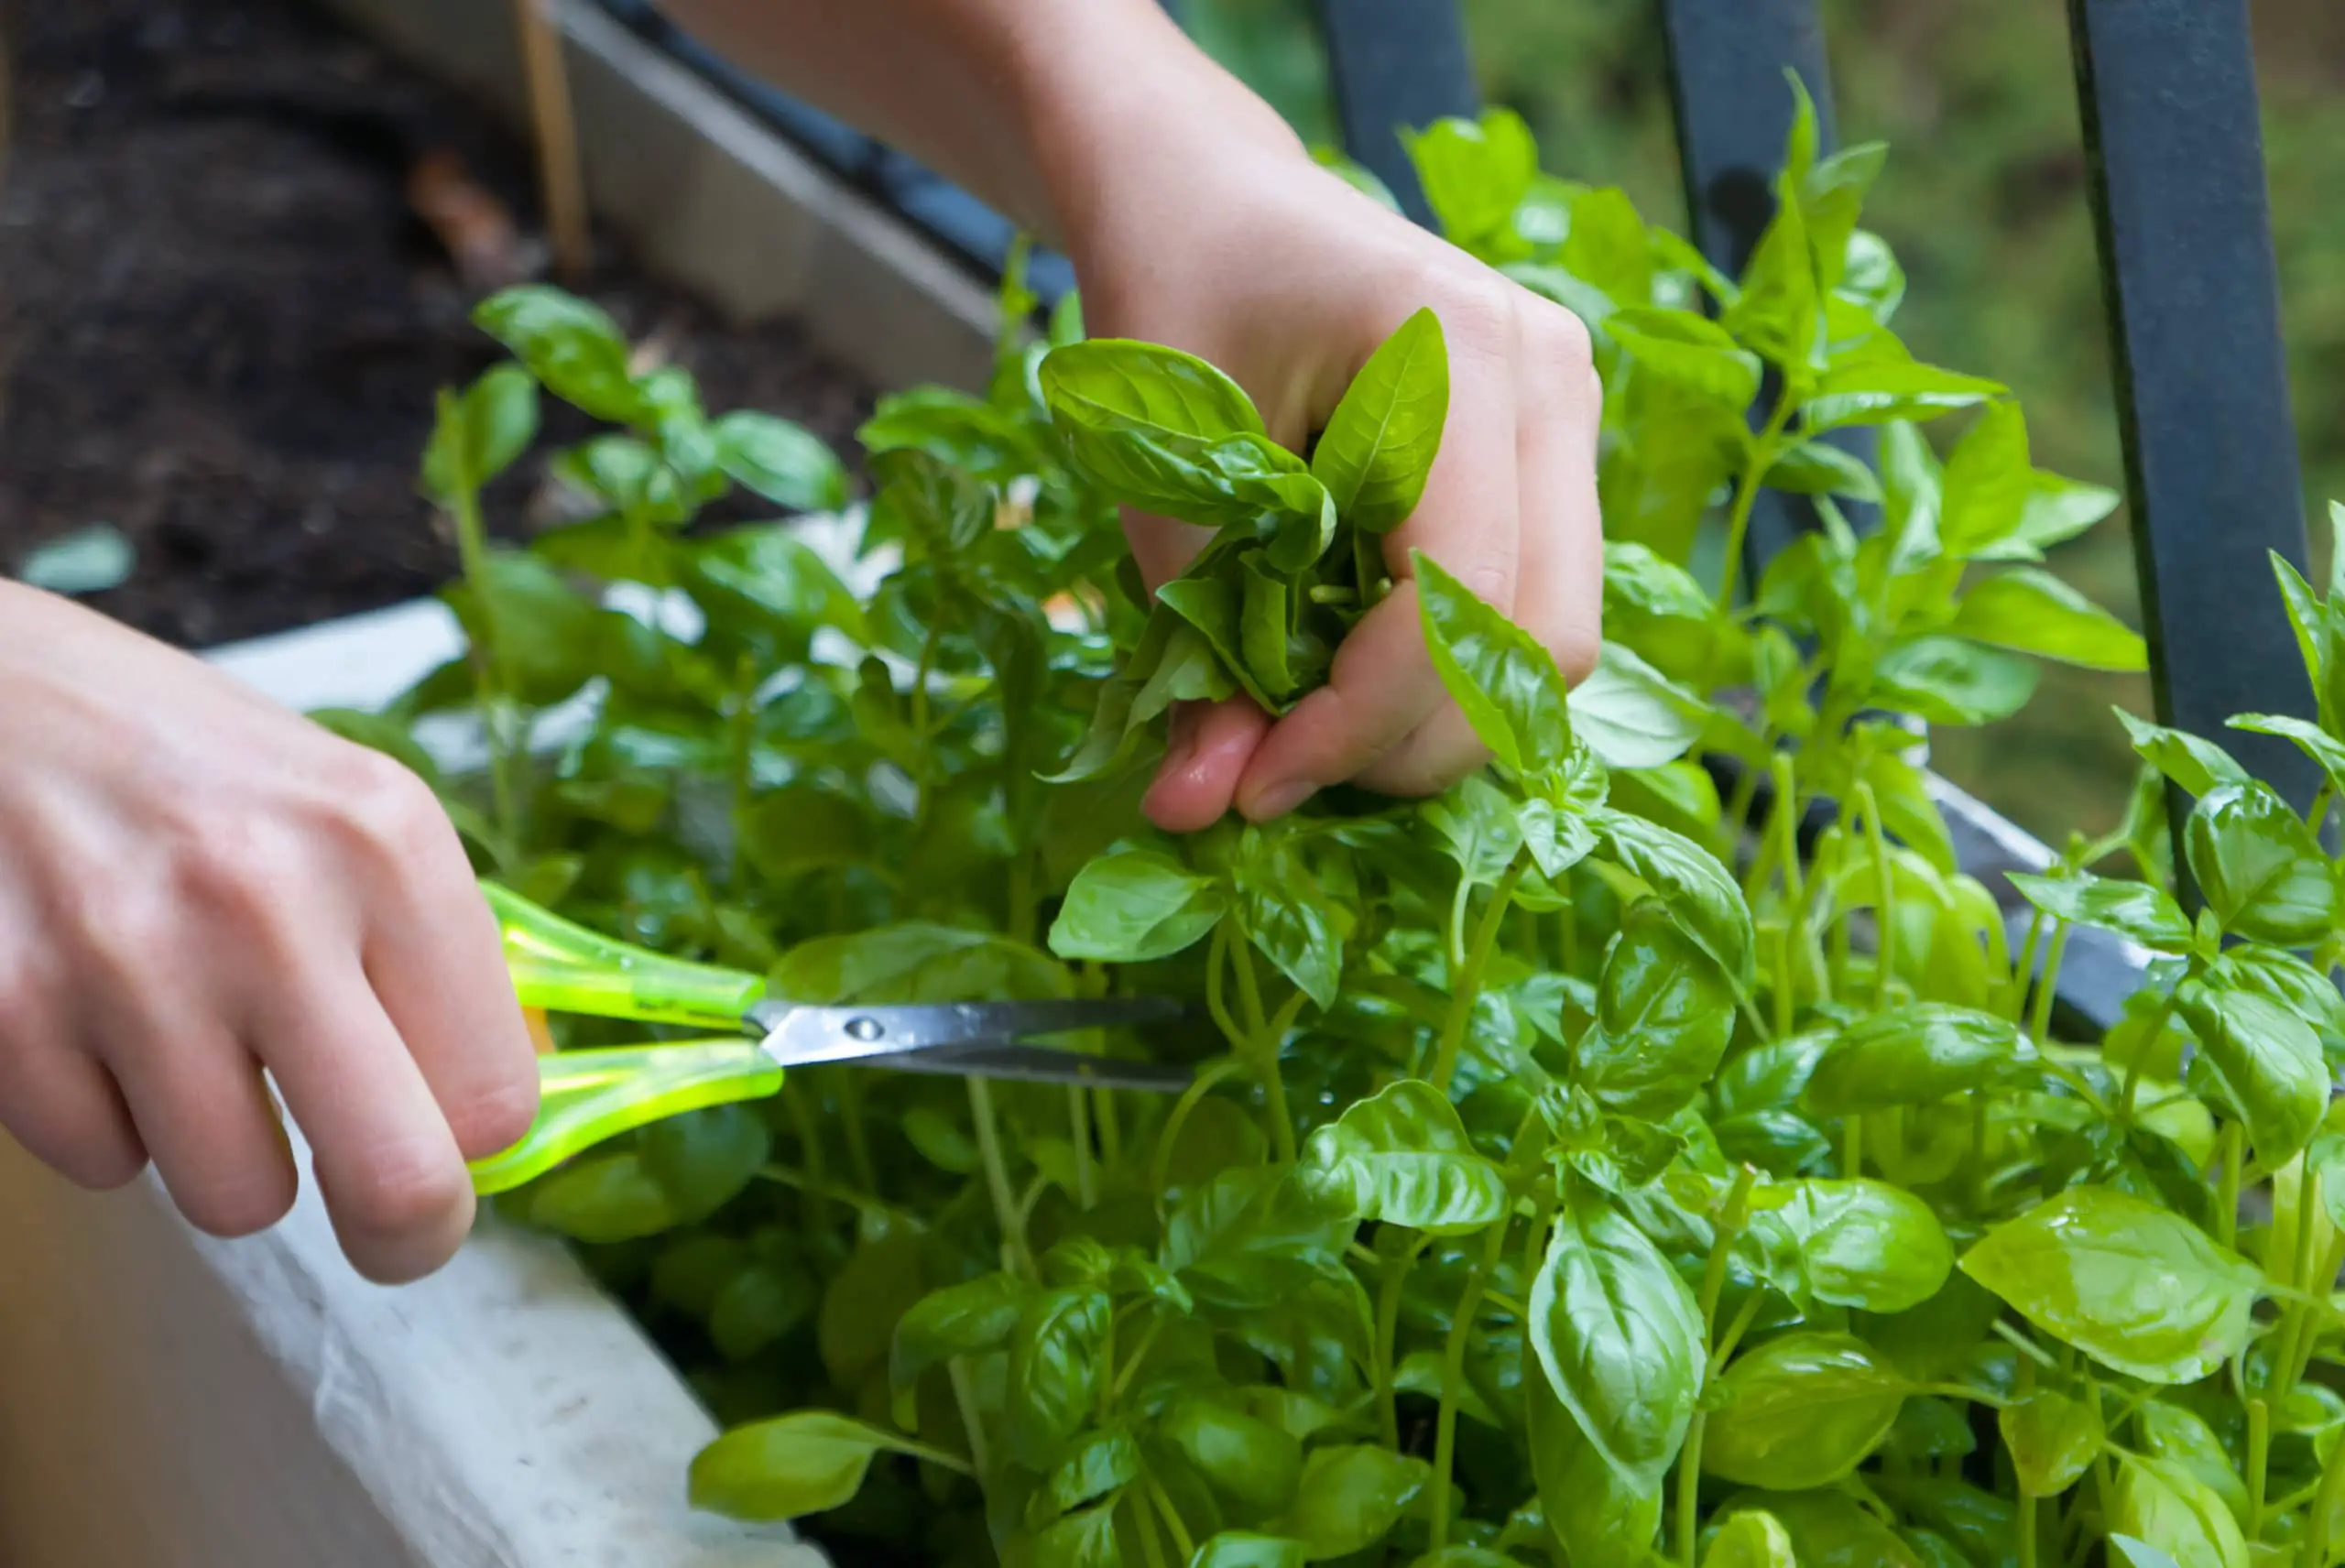
Wipe pruning shears with rubbing alcohol to clean them, avoid the spread of plant diseases, and then snip off a 4-inch rising tip of a good basil branch. Cut just below the point where the basil leaves attach to the stem; this is the cut piece’s safest location to grow roots.
Rooting Cuttings
1. In Water
Basic Cuttings are easy to root in water. To protect the basil leaves from rotting in the broth, cut the leaves from the bottom two-thirds of the stem. In a small cup or jar, place your basil cuttings. The container should be shallow enough for a third of the Basil cutting to protrude from the cup, allowing the Basil to breathe correctly.
Take jars filled with water and place it in a sunny spot, such as a windowsill facing east or west. To avoid bacteria accumulation, change the water once a day. Maybe not the first week but definitely by the second week you should be able to see that roots are starting to form.
2. In Potting Mix
I am using a pot with drainage holes in the rim, such as an 8- or 10-inch pot. Cover the pot halfway with a sterile, soilless potting mix like vermiculite or perlite. Remove the leaves from the cut basil stem’s bottom third.
To mask the rooting process easier, you should dip the cut end of the stem in a rooting hormone powder. This is not really needed, but it will certainly help the cutting take root faster. By using a pencil, you can make a hole in the potting mix that is a third of the length of your basil piece.
Place the cut end of the basil stem in the potting mix and press the soil down around it. The top few inches of potting medium can be easily moistened by spraying the pot with water. Place the pot on a windowsill with a sunny east or west orientation. To keep the cutting moist, repeat the watering once or twice a day, or as appropriate.
Transplanting Cuttings
It is time to transplant your water-rooted basil plant. You can do this when the roots are around 1/2-inch-deep or when your potted basil cutting has reached several inches tall. You can either transplant your basil plant into a 1- or 2-gallon container with soilless potting mix or plant it directly in the garden.
No matter what process you use, then someone must take the finished pots and place them in direct sunlight. The finished product enjoys being in direct sunlight. If you want to plant your Basil outside, wait until after the last frost date in your area to prevent frost damage to your new basil shrub.
Two (2) Ways to Root Basil Cutting
Basil can be planted in two ways: in water or soil. You will need basil cuttings for each form. To take a cutting from a basil vine, cut a four- to six-inch-long stem with clean herb snips or scissors. To maximize surface space for water absorption, cut it just below a leaf node (the spot on the branches where the leaves emerge) and at an angle.
Remove all leaves from the stem’s bottom third. This move is truly important if you are trying to root the water cuttings and do not want leaves to rot because they’re submerged.
Steps on How to Grow Basil Plant from Cuttings in Water
To cultivate Basil from cuttings, you will not need anything. Get started with one big complete basic plant, either your own or one from a nursery. Alternatively, ask your friends and neighbors for a plant from their backyard.
Small glass pots, a sharp knife or kitchen scissors, and freshwater are the only other things you will need. Small pebbles and rooting powder are optional. Then take the following steps:
1. Create Cuttings
Clean and sanitize the knife or scissors first. Clean with soapy water and rubbing alcohol around the blade. Split below a leaf node with a sharp knife or scissors to make cuttings that are 4 to 5 inches long. A leaf node is a position at which the leaf attaches to the main stem.
2. Have the Cuttings Ready
Remove the leaves from each cutting until the bottom two inches are bare. You can leave any tiny leaves that are only starting to form attached if you like. Most gardeners typically remove them, particularly when it comes to water propagation. Do not forget to save the basil leaves in a jar and keep them in the fridge for later use!
3. Fill Jars or Glasses with the Cuttings
Load glass jars halfway with water, carefully place the cuttings in the pots and submerge the lower 2-inches of the cuttings. Each jar can hold between three or four cuttings. Place the jars on a window sill that absorbs a lot of light.
If you leave your tiny cuttings in direct sunlight, they will burn. On the first day, the cuttings will wilt a little, but they should recover. You’ll still have plenty of cuttings if one or two don’t heal.
4. Pebbles (Optional)
In the bottom of each pot, you can place a coating of pebbles. It gives the jars a little more appeal as they hang on your windowsill for a few weeks.
5. Keep Water Fresh
You should keep an eye on the water level in each jar. Hold the stems wholly submerged in water by adding fresh water. To keep the water healthy and avoid algae growth, you will need to refresh it every day.
Basil plants do not thrive in cold temperatures but use lukewarm tap water instead. If you fail to change the water, the water will degrade in a day or two, causing the roots to rot and die.
6. Growing Roots
On the cuttings’ stems, tiny roots can begin to grow in around 5 to 7 days. Allow the white hearts to expand until they are everywhere 2-inches long. It can take up to 21 days approximately to complete the rising process.
7. Planting Your Cuttings
You should grow your cuttings indoors in pots or outdoors in a shady area with decent drainage until the roots are 2-inches deep. For the first two days, pamper the newly planted cuttings and keep them out of direct sunlight.
Steps on How to Grow Basil Plant from Cuttings in Soil
We have heard that planting your cuttings directly into a potting medium is one of the ways you can cultivate Basil. Planting the cuttings directly into a potting powder of sorts is another way to cultivate Basil. You may skip the step of letting cuttings root in water with this method of propagation. This approach would include the following items:
• 1 basil vine, big and stable
• Kitchen scissors or a sharp knife
• Planting pots in limited sizes
• Perlite, vermiculite, or soilless potting mix
• Rooting hormone powder is optional.
1. Prepare the Soil
Someone can use soilless potting mix, perlite, or vermiculite to fill the planting pots. Place the jars in a tray of lukewarm fresh water to allow the mixture to absorb moisture from the bottom up.
If the mixture gets too wet, the cutting roots may rot when put in the pot. Any nursery will sell you soilless potting mix. The mix makes enough airflow for each basil cutting’s root structure to develop and expand.
2. Get Your Cuttings
Why not take approximately a 4 to 6 inch cutting from the basil plant, while the pots are soaking. Choose a good stem and cut it cleanly at a 45° angle just below a leaf node with the knife.
3. Prepare the Stems
Remove the lower leaves from the chopping, leaving the bottom two inches bare. This is the part of the cutting that gets planted in the potting medium. At least two or three basil leaves should remain attached to the top portion of the basil plant.
4. Rooting Hormone (Optional)
Rooting hormone is a powdered agent that helps in the rooting of cuttings. Indole-3-butyric acid, also known as chemical auxins, is the active ingredient of rooting powder. On a sheet of newspaper, sprinkle a small volume of the powder. Then, before planting into the pots, simply dip the cutting’s end into the rooting powder.
5. Make Holes for the Cuttings
Poke a tiny hole in the potting mix with a pencil. The gap should be wide enough to hold the lower third of the basil cutting. Gently tap the soil around the carving.
6. Arrange the Basil Cuttings
Steam the container with hot, lukewarm water to only moisten the surface of the dirt. Place the pots in a sunny spot, preferably facing east or west. A south-facing window can expose the cuttings to too much direct sunshine, which can quickly burn them and cause wilting.
You can see new growth of basil leaves as the cuttings root. Besides, the attached leaves may begin to grow larger. Do not be tempted to use Basil right away – it might put the cutting into shock.
7. Optimize Conditions
By applying some humidity to the cuttings, you could be able to get them to root faster. You will do this by building your mini-greenhouse. In a transparent plastic bag, put the pot. To stop the plastic from getting close or from touching the cutting, poke a wooden stick or pencil into the dirt as a sort of barrier. After the cuttings have taken hold, remove the plastic.
8. Caring for Your Basilistics Cuttings
Please ensure you water the cuttings once or twice a day to keep them moist but not saturated. Mold will quickly destroy the cutting if this does not happen. The cuttings will take up to three weeks to root.
Allow them to remain in the pot, up to four weeks, to ensure a robust root system. Your fresh basil plants will be able to plant indoors or out after this time.
Some Benefits of Propagating and Growing Your Own Basil
You still do not need much evidence that growing your Basil is a bright idea, but here are a couple of the reasons why:
• Basil is an excellent culinary herb that goes well with a variety of foods, particularly tomatoes. Alternatively, it would help if you made your pesto to use in pasta dishes.
• Basil is a natural herb that can be used to cure various health problems, such as inflammation and swelling, stomach spasms, fluid retention, bowel gas, and colds.
• Basil contains calcium, iron, magnesium, potassium, and vitamins A, K, and C, among other nutrients.
• Basil has a fragrant fragrance that is pleasing to the senses.
• Bees are attracted to basil leaves.
• Basil can help drive fruit flies away.
May you take the essential details with you on how you can successfully grow Basil from cuttings.
Sowing seeds or transplanting seedlings into garden beds or pots is how most gardeners cultivate Basil. However, there is a third alternative that is much more practical than waiting for seeds to germinate! Growing Basil from cuttings is a fast, convenient, and inexpensive way to increase your homegrown basil crop.
Basil is a favorite herb among gardeners. Kinds of pasta, pizzas, sauces, and pesto all benefit from the fiery clove taste. It prefers sun and should not be planted outdoors until late spring when the chance of frost has passed.
How to Grow Basil from Cutting? The Basil can be grown in three steps: Taking the Cuttings of the Basil, Rooting the Cuttings, and Transplanting the Cuttings. Look for a garden bed or a place on the patio where the basil plants can receive a minimum of at least eight hours of direct sunlight per day before deciding where to plant them.
Taking cuttings is the easiest way to cultivate Basil during the growing season, typically spring, summer, and autumn. When flowering plants are nearing the end of their growth period, it’s an excellent idea to take cuttings from the plants that are not flowering.
It is that simple. Here is everything you need to know about growing Basil, including how to succeed in water or soil and how to transplant your new cuttings safely.
Steps on How to Grow Basil Cutting
Taking Cuttings
Take your cuttings from an outdoor flowering basil plant. Using a cut basil leaf from the grocery store’s produce department is less effective because they are not necessarily new enough to root.
Wipe pruning shears with rubbing alcohol to clean them, avoid the spread of plant diseases, and then snip off a 4-inch rising tip of a good basil branch. Cut just below the point where the basil leaves attach to the stem; this is the cut piece’s safest location to grow roots.
Rooting Cuttings
1. In Water
They say it is easy to root basil cuttings in water. To protect the basil leaves from rotting in the broth, cut the leaves from the bottom two-thirds of the stem. In a small cup or jar, place your basil cuttings. The container should be shallow enough for a third of the Basil cutting to protrude from the cup, allowing the Basil to breathe correctly.
The jar should be filled with water and then placed set it in a sunny spot, such as a windowsill facing east or west. To avoid bacteria accumulation, change the water once a day. Within a few weeks or so, you should see roots forming.
2. In Potting Mix
I am using a pot with drainage holes in the rim, such as an 8- or 10-inch pot. Cover the pot halfway with a sterile, soilless potting mix like vermiculite or perlite. Remove the leaves from the cut basil stem’s bottom third.
Cut the end of the stem and dip it directly into water and then into a pot of hormone rooting power. This is not essential, but it will help the cutting take root faster. Using a pencil or a branch or a screwdriver or anything else that will serve the purpose, make a hole in the potting mix that is a third of the length of your basil piece.
Place the cut end of the basil stem in the potting mix and press the soil down around it. Spray the pot with water to moisten the top few inches of potting medium. Place the pot on a windowsill with a sunny east or west orientation. To keep the cutting moist, repeat the watering once or twice a day or as appropriate.
Transplanting Cuttings
It is time to transplant your water-rooted basil plant. You can do this when the roots are around 1/2-inch-deep or when your potted basil cutting has reached several inches tall. You can either transplant your basil plant into a 1- or 2-gallon container with soilless potting mix or plant it directly in the garden.
No matter what process you use, the finished product should be put in direct sunlight. If you want to plant your Basil outside, wait until after the last frost date in your area to prevent frost damage to your new basil shrub.
Two (2) Ways to Root Basil Cutting
Basil can be planted in two ways: in water or soil. You will need basil cuttings for each form. To take a cutting from a basil vine, cut a four- to six-inch-long stem with clean herb snips or scissors. To maximize surface space for water absorption, cut it just below a leaf node (the spot on the branches where the leaves emerge) and at an angle.
Remove all leaves from the stem’s bottom third. This is quite important if you are trying to root the water cuttings and do not want any leaves to rot because they’re submerged.
Steps on How to Grow Basil Plant from Cuttings in Water
To cultivate Basil from cuttings, you will not need anything. To begin, all you need is one big, complete basil plant, either your own or one from a nursery. Alternatively, ask your friends and neighbors for a plant from their backyards.
Small glass pots, a sharp knife or kitchen scissors, and freshwater are the only other things you will need. Small pebbles and rooting powder are optional. Then take the following steps:
1. Create Cuttings
Clean and sanitize the knife or scissors first. Clean with soapy water and rubbing alcohol around the blade. Split below a leaf node with a sharp knife or scissors to make cuttings that are 4 to 5 inches long. A leaf node is a position at which the leaf attaches to the main stem.
2. Have the Cuttings Ready
Remove the leaves from each cutting until the bottom two inches are bare. You can leave any tiny leaves that are only starting to form attached if you like. Most gardeners typically remove them, particularly when it comes to water propagation. Do not forget to save the basil leaves in a jar and keep them in the fridge for later use!
3. Fill Jars or Glasses with the Cuttings
Load glass jars halfway with water, carefully place the cuttings in the pots, and submerge the lower 2-inches of the cuttings. Each jar can hold between three or four cuttings. Place the jars on a window sill that absorbs a lot of light.
If you leave your tiny cuttings in direct sunlight, they will burn. On the first day, the cuttings will wilt a little, but they should recover. You’ll still have plenty of cuttings if one or two don’t heal.
4. Pebbles (Optional)
In the bottom of each pot, you can place a coating of pebbles. It gives the jars a little more appeal as they are hanging on your windowsill for a few weeks.
5. Keep Water Fresh
You should keep an eye on the water level in each jar. Hold the stems wholly submerged in water by adding fresh water. To keep the water healthy and avoid algae growth, you will need to refresh it every day.
Basil plants do not thrive in cold temperatures but use lukewarm tap water instead. If you fail to change the water, the water will degrade in a day or two, causing the roots to rot and die.
6. Growing Roots
On the cuttings’ stems, tiny roots can begin to grow in around 5 to 7 days. Allow the white roots to expand until they are around 2-inches long. It will take about 14 to 21 days to complete the rising process.
7. Planting Your Cuttings
You should grow your cuttings indoors in pots or outdoors in a shady area with decent drainage until the roots are 2-inches deep. For the first two days, pamper the newly planted cuttings and keep them out of direct sunlight.
Steps on How to Grow Basil Plant from Cuttings in Soil
Planting the cuttings directly into a potting powder is another way to cultivate Basil. You may skip the step of letting cuttings root in water with this method of propagation. This approach would include the following items:
• 1 basil vine, big and stable
• Kitchen scissors or a sharp knife
• Planting pots in limited sizes
• Perlite, vermiculite, or soilless potting mix
• Rooting hormone powder is optional.
1. Prepare the Soil
Some people can use Soilless potting mix, perlite, or vermiculite to fill the planting pots. Place the pots with the cuttings, in a tray of lukewarm fresh water to allow the mixture to absorb moisture from the bottom up.
If the mixture gets too wet, the cutting roots may rot when put in the pot. Any nursery will sell you soilless potting mix. The mix makes enough airflow for each basil cutting’s root structure to develop and expand.
2. Get Your Cuttings
Take a cutting from the basil plant, say between 4 to 6 inches, while the pots are soaking. Choose a good stem and cut it cleanly at a 45° angle just below a leaf node with the knife.
3. Prepare the Stems
Remove the lower leaves from the chopping, leaving the bottom two inches bare. This is the part of the cutting that will be planted in the potting medium. At least two or three basil leaves should remain attached to the top portion of the basil plant.
4. Rooting Hormone (Optional)
Rooting hormone is a powdered agent that helps in the rooting of cuttings. Indole-3-butyric acid, also known as chemical auxins, is the active ingredient of rooting powder. On a sheet of newspaper, sprinkle a small volume of the powder. Then, before planting into the pots, simply dip the cutting’s end into the rooting powder.
5. Make Holes for the Cuttings
Poke a tiny hole in the potting mix with a pencil. The gap should be wide enough to hold the lower third of the basil cutting. Gently tap the soil around the carving.
6. Arrange the Basil Cuttings
Steam the container with hot, lukewarm water to only moisten the surface of the dirt. Place the pots in a sunny spot, preferably facing east or west. A south-facing window can expose the cuttings to too much direct sunshine, which can quickly burn them and cause wilting.
You can see new growth of basil leaves as the cuttings root. Besides, the attached leaves may begin to grow larger. Do not be tempted to use Basil right away – it might put the cutting into shock.
7. Optimize Conditions
By applying some humidity to the cuttings, you could be able to get them to root faster. You will do this by building your mini-greenhouse. In a transparent plastic bag, put the pot. To make sure the plastic does not touch the cutting, poke a wooden stick or pencil into the dirt. After the cuttings have taken hold, remove the plastic.
8. Caring for Your Basil Cuttings
Water the cuttings a few times each day to keep them moist but not saturated. Mold will quickly destroy the cutting if this does not happen. The cuttings will take about two to three weeks to root.
Allow them to root a little longer in the pot, up to four weeks, to ensure a robust root system. Your fresh basil plants will be able to plant indoors or out after this time.
Benefits of Propagating & Growing Your Own Basil
You still do not need much evidence that growing your Basil is a bright idea, but here are a couple of the reasons why:
• Basil is an excellent culinary herb that goes well with a variety of foods, particularly tomatoes. Alternatively, it would help if you made your pesto to use in pasta dishes.
• Basil is a natural herb that can be used to cure various health problems, such as inflammation and swelling, stomach spasms, fluid retention, bowel gas, and colds.
• Basil contains calcium, iron, magnesium, potassium, and vitamins A, K, and C, among other nutrients.
• Basil has a fragrant fragrance that is pleasing to the senses.
• Bees are attracted to basil leaves.
• Basil can help drive fruit flies away.
Take the essential details with you on how you can successfully grow Basil from cuttings.
Jenny M
Tribal Writer
Edited by
Patricia Godwin