
Do you have the itch to start growing vegetables or flowering blooms in winter? You can do seed starting in a milk jug – even during the winter before the usual start of the growing season in spring. Your milk jug functions as a mini greenhouse!
Like a mini greenhouse, your milk jug provides a safe place where your seeds can germinate and grow outdoors. You can start winter sowing from mid-late winter until spring.
Winter Sowing in Milk Jugs
Winter sowing is a ‘set-it-up and forget-it’ gardening technique – if your containers get some precipitation.
1. Choose Your Material.
You can use any semi-transparent material (container) or semi-opaque containers for winter sowing. They should be able to accommodate at least 2 inches of soil and 5 inches of seed growth. They can be strawberry containers or juice jugs.
Most gardeners, however, prefer milk jugs because they are transparent and allow in a suitable amount of light.
Using very clear plastic containers can make your seeds get too much humidity and heat. You do not have to worry about this in cooler climates.
In milder climates, there could be warmer, sunny days during winter or early spring. Large temperature fluctuations can cause your seeds to prematurely germinate and die due to the freezing night temperatures.
Since just the right amount of light will get into milk jugs, temperature fluctuations will not affect your seeds and they will remain dormant.
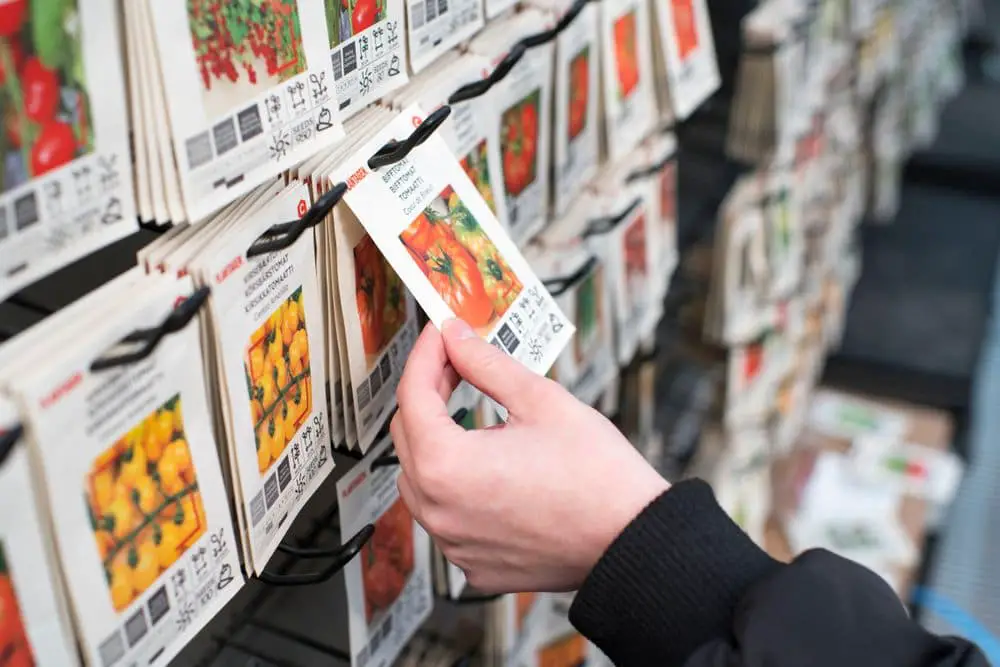
2. Choose Your Seeds.
Seed starting in milk jugs is suitable for germinating many kinds of annuals, perennials, and vegetables. It is not, however, suitable for all plants. It is, therefore, important to choose the right type of seeds.
Remember to check the seed packets for the keywords:
- Perennial
- Cold treatment period
- Cold hardy
- Cold stratification
- Vernilization
- Direct sow outside year-round
- Direct sow outside in fall
- Soft sowing
3. Prepare Your Milk Jugs.
Wash the milk jug in soapy water and rinse it thoroughly. Disinfect it for about 1 minute with a bleach solution (1 teaspoon of bleach for every quart of water). Discard the cap – you have no use for it.
Make drainage holes in the bottom of your milk jug to allow excess water to drain out. You can use a Philips head screwdriver or a utility knife to make the holes. Heat the tip of your screwdriver on the stovetop to make it easier to make drain holes.
Cut 4 holes in the bottom of your milk jug (just below the bottom of the handle). Leave about 2 inches so the milk jug stays connected. It will also serve as a hinge that will allow you to open and close the milk jug.
Your milk jug will have enough ventilation without its cap, but you can also drill a few small holes in the top of the milk jug.
4. Prepare Your Potting Mix.
Use potting mix and not soil for seed starting because potting mix drains well. Do not use starting mixes or those that have a lot of peat moss.
Choose soilless potting mixes that contain vermiculite and/or perlite, shredded bark, and some fillers. Organic potting mix is a good choice because it does not dry out too quickly.
5. Add The Potting Mix to Your Milk Jug.
Moisten your potting mix with water before adding it to your milk jug. Your potting mix should be able to form a ball when you press it together. It should not be too wet that water drips out.
Place at least 4-inch thick potting mix in the bottom of your milk jug. This is deep enough for most plants. A shallow potting mix will cause the plant roots to freeze early. Work the potting mix to break up any clumps.
6. Sow Seeds.
Follow the instructions on the seed pack. You could either place the soil on top of the soil or in the soil.
Some seeds only require light germination so you should not cover them with the potting mix. Others can germinate even without light, so they should be buried a bit in the potting mix.
As a rule, leave smaller seeds on the surface of the soil. Pat them down a bit so they can establish contact with the soil. Use your fingers to push larger seeds 1/8 inch deep into the soil.
You can sow about 16 small seeds and 9 large seeds in a milk jug.
7. Watering
Carefully water your seedlings using a spray bottle. Make sure to moisten the top 1 inch of the soil. Avoid using a watering can as the flow of water could be too strong and could disturb your seeds.
You are watering only so that the seeds can create good contact with the soil.
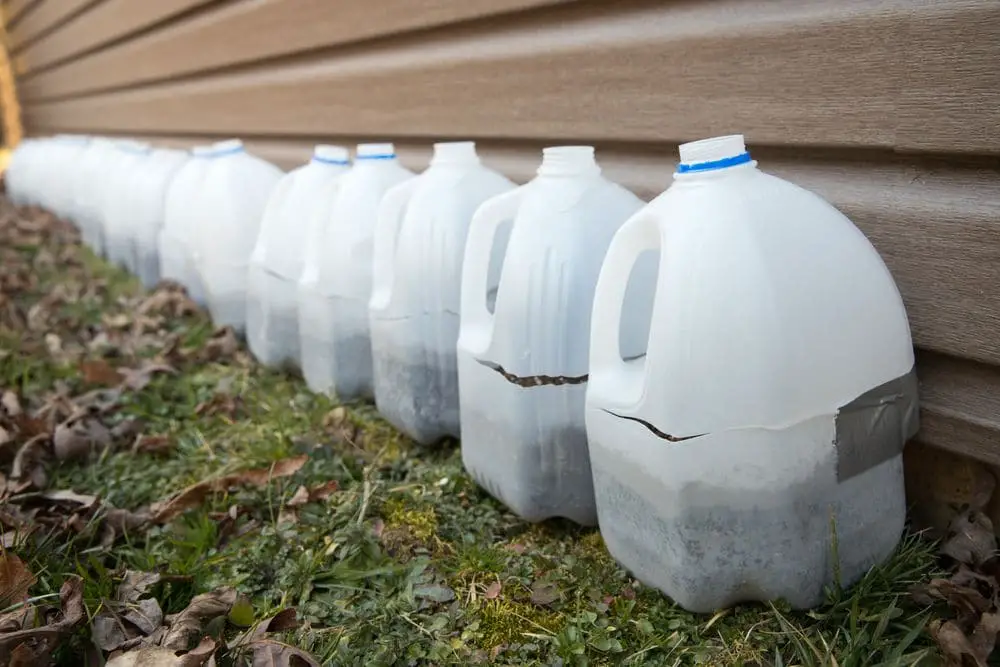
8. Tape Shut and Label Your Milk Jugs.
Close and seal your milk jugs with duct tape.
Labeling each milk jug is important when seed starting so that you remember what seeds you sowed in each of your mini greenhouses. It is better to sow one type of seed per milk jug to keep things simple.
Write down the seed type you planted and the sowing date. You can use a garden marker and label on the tape.
9. Set Your Milk Jugs Outside.
Place your milk jugs outside after sowing, watering, and labeling. Allow your milk jugs to be exposed to the elements. Choose a spot outside where your seeds will receive plenty of sunlight but will not be subjected to high winds and blow over.
Avoid placing your milk jugs under an overhang. Your goal is to allow snow, rain, and sun to get into your milk jugs.
If you live in warmer regions, you can place your milk jugs where there is partial sun, like under trees. This will help moderate the temperature inside the milk jugs and protect the seeds against direct sunlight.
10. Forget About Your Milk Jugs Until Spring.
Your seed starting task is done after placing the milk jugs outdoors. Mother nature will take care of the rest of the job.
Check on your seedlings regularly until spring. A monthly check will do.
You do not need to water your seeds unless it becomes the weather gets unreasonably sunny. Water your seeds with your spray bottle but do not take off the tap. Water from the holes on the top of the milk jug. That should be enough water to create a moist, humid atmosphere.
11. Check For Any Signs of Germination.
When Spring has arrived, and the weather starts to warm up, check your milk jugs for any signs of germination.
The seeds of hardy plants you sowed will germinate first (broccoli, spinach, lettuce, and perennials that bloom in spring).
Once the seedlings have grown tall or are already touching the top of the inside of the milk jugs, it is time to open the jugs as your seeds have already germinated!
12. Open Your Milk Jugs.
Remove the duct tape and open your milk jugs. Water your plants if the weather is dry because you need to keep the soil moist.
Leave your milk jug open during the day but continue to monitor the temperature and weather.
Close your milk jugs overnight during cold nights when the temperature drops below freezing. Close your milk jugs if there is forthcoming heavy rain, heavy winds, or hail.
In warmer regions, be mindful of the sunlight. You do not want your little seedlings to soak in the sun. Water your seedlings and place them in a spot where they will not be exposed to direct sunlight, especially in the middle of the day.
At this point, you are done with seed starting. You are ready to transplant your seedlings when they have developed true leaves.
What is Winter Sowing?
Commence the growing season for some of your vegetables and flowers in January using milk jugs in winter sowing.
It may be too early to start your seeds indoors, but you can jumpstart your growing season. Winter sowing is an easy way for successful seed starting outdoors.
The process of winter sowing may look weird! Seeds need moisture and warmth to sprout, so how can they germinate in the cold?
Some seeds need the cold to prepare for germination and this is where winter sowing comes in.
Winter sowing is the process of seed starting in closed and clear ventilated containers, such as milk jugs, instead of directly outdoors. The milk jugs are placed outdoors so the seeds can experience the cold of winter.
The seeds are dormant while chilling. With the coming of spring, heat and light increase to trigger germination. The seeds will germinate as in nature – at their own pace.
In short, winter sowing is seed starting outdoors during the winter. You plant your seeds in recycled plastic containers such as milk jugs to create a mini greenhouse. You then place the container outside in the cold and snow.
How Winter Sowing in Milk Jugs Works
The milk jug, which functions as a greenhouse, protects your seeds from the harsh winter temperatures, as well as from pests and diseases. With regular precipitation, the rain and snow that goes through the open lid of the milk jug provide the seeds with water.
Seeds typically are dropped in the fall, then lay dormant during winter. As spring approaches, seeds slowly come to life. Sowing seeds in milk jugs follow these conditions.
When you sow seeds in a milk jug, you duplicate these conditions. You allow your seeds to germinate and start growing several weeks before you can do direct sowing.
Benefits of Winter Sowing
Seed starting indoors can be difficult. Some indoor conditions may hinder germination. Most of the problems though can be avoided with winter sowing.
The technique also comes with many benefits:
- Many seeds need to go through vernalization (exposure of seeds to low temperature to encourage seed production or flowering) or stratification (treating seeds to encourage natural conditions seeds needs to experience for germination to occur) to germinate and grow flowers successfully.
- If you are seed starting indoors, you may have to place the seeds in your refrigerator for a few months for the proper cold treatment. Winter sowing in milkjugs give the seeds the natural cold treatment because they are kept outdoors during the winter.
- Seedlings grown indoors tend to be leggy because they stretch toward the direction of the sun. Seedlings grown outdoors will be thicker, stronger, and healthier because they get real sunlight. This means they have a higher rate of survival.
- Winter sowing gives your plants fewer chances of getting hit with fungus gnats (pests) or damping-off disease.
- Your planting season can start earlier.
- With winter sowing in milk jugs, you do not need to harden off seedlings. Hardening off seedlings (gradually exposing seeds to outdoor conditions) is needed when you seed starting indoors.
- More often, you will have lesser space indoors and it will be challenging for you to do and seed starting can be easier outdoors.
- Winter sowing in milk jugs does not entail filling trays with water and setting up lights. You also do not need to bring the seedlings outside during the day and back inside during the night.
More importantly, winter sowing requires very little equipment and will be more cost-effective.
Seeds That Are Best for Winter Sowing
Cold season vegetables, hardy annuals, and native perennials are the best for winter sowing. The terms on the seed packet may also specify that they may be ideal for winter sowing – “hardy”, “requires cold stratification”, or “cold tolerant”.
Seeds that need to be sown indoors for about 8 weeks or more before the last frost, may also be ideal for winter sowing.
You need to stay away from seeds that are best sown directly or need warm temperatures to germinate.
Conversely, seed starting for cold-tolerant seeds is done in the coldest months of winter because they need the chilling period.
Here are some seeds that are ideal for winter sowing:
Vegetables
- Cauliflower
- Cabbage
- Broccoli
- Lettuce
- Spinach
- Peas
- Radish
- Spring onions
- Beets
- Arugula
- Kale
Annual Flowers
- Sunflowers
- Poppies
- Amaranth
- Larkspur
- Strawflowers
- Marigolds
- Bachelor’s Buttons
- Zinnias
- Cosmos
- Calendula
You can, however, still winter sow seeds that are not cold hardy. Seed starting for those that love warm temperatures is done in spring when nighttime temperatures do not dip too low.
When to Start Winter Sowing
You can do winter sowing anytime after December 21 (Winter Solstice). This is when the days are getting longer, making it ideal for your seedlings.
Everyone seems to be busy for the holidays currently, many gardeners find January and February more practical for seed starting.
Monitoring your Milk Jugs
The only maintenance job you need to do with your milk jugs is to make sure they do not overheat, and the soil does not dry out. It can get hot inside your milk jugs, especially if they are out in the sun.
You can add more ventilation holes or make the holes larger at the top of the milk jugs, so they vent more. You can also slightly open the lids.
How Long Does It Take for Winter Sown Seeds to Grow?
The seeds you planted in your milk jugs will grow at their own pace. Some types of seeds will germinate before the snow melts on your milk jugs. Your other seeds may only start growing when the weather gets warmer in spring.
Most winter sown seeds start to germinate in early March in colder zones. Sprouts may start to appear much earlier in warmer zones. It can also vary depending on the present weather.
How to Transplant Winter Sown Seedlings to the Garden
Hold your hand over the top of your milk jug and flip it upside down and remove the seedlings. Then turn your milk jug right-side up again.
You can also opt to cut the front of your milk jug with scissors, remove the front portion of the jug, and push the seedlings so they slide out.
Gently pull the seedlings apart. You may have to tear some of the roots to separate them from the seedlings.
Winter sown seedlings tend to entangle at the roots. But since they are grown in tough conditions, the roots of the seedlings are hardy enough to be severed and torn when they are ready for transplanting.
Transplant your seedlings into your garden or pot them.
Final Thoughts on Seed Starting – A Practical Guide to Winter Sowing in Milk Jugs
Winter sowing is an amazing way to grow seeds for your garden way ahead of the growing season the following summer.
Seed starting in the winter is fun. Many gardeners even consider it a game- changer.
You can do winter sowing at your own pace. The nicest part is you do not have to harden your winter-sown seedlings.
Winter sowing does not require any maintenance. You just must prepare your milk jugs, plant your seeds, wait for them to germinate, and when true leaves come out, transplant the seeds into your garden.