
Composting is a practical and straightforward method of enhancing the natural life of your soil’s biology. It is required to produce gorgeous flowers and delectable organic foods.
How to Make Compost: When bacteria and microorganisms break down your kitchen scraps and yard waste, they produce an enriching soil additive that is called compost and may be used as a fertilizer. Here’s Three Different, Easy to Follow, Ways Of Making Compost
Types of Composting
It’s important to understand that there are three forms of composting: cold composting, hot composting, and vermiculture (also known as worm composting) before you start working with your compost for gardening.
Simply follow the instructions on how to create a compost using any combination of the three techniques described below.
A Step-by-Step Guide in Making Cold Compost
1. Cold Composting
When it comes to composting at home, cold composting is the most convenient method since it involves minimal effort to set up and practically no maintenance or monitoring.
Select the Type of Compost Bin for Your Backyard
Either an open pile or a compost bin can be used for this project. Bins offer the advantages of being aesthetically pleasing, keeping animals out, and retaining warmth.
Compost bins are available for purchase from several garden and home supply stores, or you may construct your compost bin.
The size and kind of compost bin you purchase, or construct will be determined by the amount of biodegradable waste you create.
A typical slatted wooden compost bin is suitable for this purpose since it allows for proper ventilation and drainage.
A good amount of contact with the earth is also necessary since the soil will assist in reactivating the composting process.
Determine the Location of Your Compost Bin
The best setting is one that is level, well-drained, and sunny throughout the daytime. Most essential, you should choose a place that is handy for you.
Considering that it is located at the rear of your yard, are you prepared to wade through snow to get to it even though it is the middle of winter?
The compost container should be placed away from the house, but at a location that is still easily accessible from the kitchen.
Place the bin on a flat surface so that any liquid from decaying garbage may drain away from the container.
Ideally, your compost heap or bin should be in a partially or completely shaded location.
Keep in mind that if you are planning a kitchen garden, it may be beneficial to have a composting area close at hand.
Alternate the Layers
Begin by layering coarse objects (such as twigs) on top of the soil to provide for drainage and aeration. Leaves should be used to cover this layer.
After that, just alternate between layers of green materials (nitrogen-rich materials) and layers of brown materials (carbon-rich materials) (carbon-rich material).
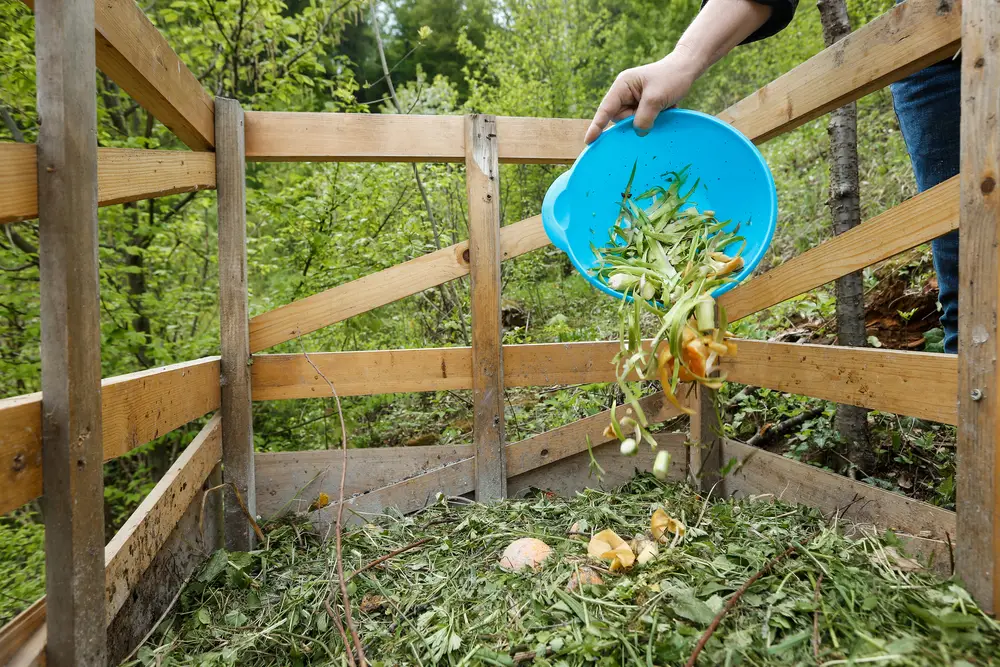
Add Your Kitchen Waste
Put your kitchen compostable in a container in your kitchen and forget about them. Locate a convenient location to keep this container — on the counter, beneath the sink, or in the freezer, for example.
Empty the contents of the container into the compost bin after it has reached capacity.
It is important to cover the food scraps or yard debris with a layer of browns whenever they are added. If you do not include browns in your compost, it will be damp and will decompose at a slower rate.
Gather and store dried leaves in an old garbage can throughout the fall season, if feasible, so that you may use them in your compost all year long.
Keep Your Compost Covered
It is important to ensure that any kitchen waste is covered with garden pruning once it is added to the compost heap and that moisture levels are not too high, since this might lead to inadequate air in the heap if flies are a problem.
To prevent rodent infestations, it’s also a good idea to cover your compost heap if you’re adding food waste to it.
It is important to cover your compost while it is raining, otherwise, you may end up with a compost combination that is too damp.
Keep Your Compost Bin in Good Condition
Make sure the following parameters are followed in your compost bin to speed up getting completed compost more quickly:
When you are adding new material, make careful to include it in the bottom levels. Materials should be as moist as a sponge that has been wrung out.
To obtain this moisture level, either dry materials or water might be used, depending on the situation.
It is important to mix or flip the compost once a week to aid in the breakdown process and the elimination of odor.
Because a lack of moisture will cause the decomposition of the compost to be slowed or even halted, it is important to water the compost regularly during extremely dry weather.
Fresh vegetable and fruit peelings, as well as freshly cut grass clippings, are excellent sources of moisture for your garden.
You might try adding some chopped woody debris, or shredded cardboard or newspaper if your compost is becoming too moist to work with.
Collect and Use Your Compost
The finished compost will be black and crumbly, and it will smell like the ground. In most cases, you should be able to harvest completed compost within four to six months after beginning your composting project.
The finished compost will be deposited at the top of the bin or compost pile after it is finished.
Remove all the finished compost from the bin but leave the unfinished components in the bin to continue decaying while the finished compost is removed.
Before using your compost, check to see that the decomposition process has been completed; otherwise, bacteria in the compost might extract nitrogen from the soil and cause plant development to suffer.
A Step-by-Step Guide in Making Hot Compost
2. Hot Composting
Hot Composting Works Much Faster Than Cold Composting
In most cases, it’s the approach of choice for more dedicated gardeners.
Hot composting is more efficient, and you may produce compost in as little as one to three months, particularly in warm weather.
Hot composting would necessitate the use of four different components: air, water, nitrogen, and carbon.
These four components become food for microbes, which can speed up the decaying process if left unattended.
Garden waste accumulates in plenty during the spring and fall seasons, allowing you to make a second batch of compost while another batch is being “cooked” in the meanwhile.
Mark off the area where you’ll be putting your pile. It should be a minimum of 120x120cm in size.
Alternatively, you might purchase a heated compost bucket to use for your composting needs.
Prepare your ingredients by chopping them up. This may be accomplished by just running the lawnmower over them since you need to chop everything up as finely as possible to ensure that it breaks down as rapidly as possible.
After you’ve added some ready-made compost that will function as an “activator” to get the process started, combine everything in a pile or a large bin and turn it over.
Fill the bowl halfway with water to ensure that all of the ingredients are uniformly saturated.
Keep an eye on the soil temperature and moisture to ensure that the compost heap remains in good condition. Within 24 to 36 hours, the pile should begin to heat up.
The optimal temperature is between 60 and 68 degrees Celsius.
Using a compost monitor, you can determine whether or not this is the case. Some of the bins are also equipped with a monitor built into the lid.
The pile should be turned when it has begun to cool down a little bit. When the microbial activity is restarted, the process is known as “cooking.”
If the compost appears to be dehydrated, add some water to it. If, on the other hand, the pile begins to smell foul, it is most likely since it is overly damp.
Excess moisture will be absorbed by the addition of shredded newspaper. If there is a chance of rain, cover the pile with a tarpaulin to prevent it from becoming wet.
The result should be a dark brown, crumbly compost after two to three weeks of work. It’s critical to let it ‘rest’ for a further two weeks before utilizing it for any purpose.
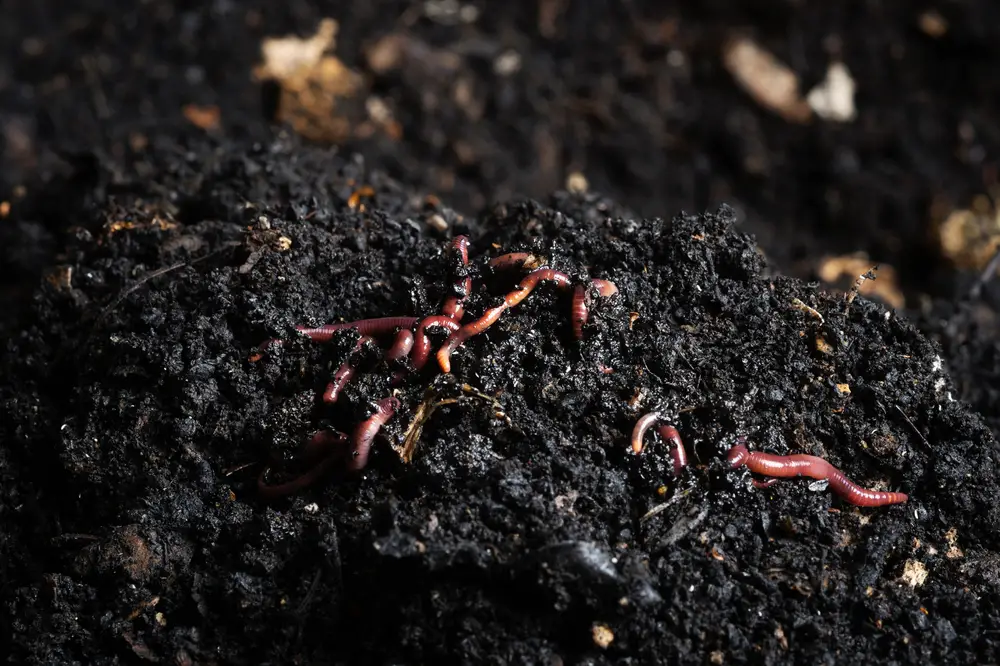
3. Vermiculture or Worm Composting
Vermicomposting Is A Method Of Producing Compost That Relies On Worms.
As a result of piling your food scraps with other biodegradable debris, worms will slowly consume it, allowing them to excrete worm castings, which are high in nitrogen.
These nitrogen-rich castings, on the other hand, aren’t merely generated by any worm. This would necessitate the use of earthworms or “red worms.”
They are typically affordable and may be acquired at a local garden supply store or on the internet.
A Step-by-Step Guide in Making Vermiculture or Worm Compost
Purchase and Prepare the Garbage Can
To allow for air circulation and drainage, drill holes in the Rubbermaid storage bin’s sides, bottom, and top (too few or too many holes can be a negative thing, so limit the total number of holes to about 20).
Purchase a bin that is opaque rather than transparent, as the worms require a dark environment inside.
Determine the Location of the Compost Bin
It is critical to consider where you will put your compost container. You may have to carefully conceal the compost bin so that it is not visible from the outside if you live in an apartment building that does not allow storage on balconies.
Additionally, maintain the trash in a shaded location. Neither too much heat nor too much light should be provided to the worms.
Preparing Bedding using Shredded Paper
Shred newspaper into thin strips to use as bedding for the worms that you will be adding later in the process. Avoid using glossy paper, such as the type of paper that advertisements are frequently printed on.
Newspapers and the paper that lines the interior of phone books are safe for composting worms to consume since the inks used in these products are rigorously regulated by the United States government.
Anything else is suspect, so recycle whatever else you can find different. Toilet paper tubes and egg cartons, as well as other types of cardboard, are excellent for use as worm bedding. (Glossy boxes, such as those used for cereal, are not acceptable).
Spray the paper with enough water to make it damp, but not dripping wet. Always maintain this wet consistency in the bedding.
Prepare the Food and Wait
Wait approximately two weeks after adding a tiny amount of food and a small scoop of earth. A healthy crop of microorganisms is produced by the food, which the worms consume.
Incorporate the Worms
Red worms, also known as Eisenia fetida, are the ideal worms to use in your vermicomposting bin. It is possible to get a box of them for roughly $20 at your local garden shop or to order them online.
They should reproduce in your compost bin, which means you should only have to purchase worms once.
Do not put earthworms in your garbage disposal. They will perish, and your compost will be a complete failure.
Load the Bin with Waste Materials
As opposed to feeding the worms, you will be “feeding the bin” since, while worms do consume some of the waste material placed in the compost bin, they mostly consume the bacteria that break down the trash.
Fruits and vegetables (except for citrus fruits, which should be fed in moderation), coffee grounds, tea bags, and broken eggshells are all good foods to throw out.
Citrus fruits, carbohydrates (bread, rice, etc.), hot peppers, onions, greasy meals, and sweet foods are examples of foods that should only be consumed in moderation.
Never include meat or dairy products, as well as any type of human or pet faeces.
Buy what you need and don’t overdo the waste situation at home. Keep an eye on the garbage can to see which foods decompose and which foods do not.
Foods such as lettuce disintegrate almost immediately, but banana peels take a long time to break down at all. Fill the bin with fresh shredded newspaper or water, if necessary, when you’re finished feeding it.
Harvest the Compost from the Pit and Use It
You may have some nutrient-rich worm castings that you may collect from your bin and use as fertilizer for your garden plants within a few months of setting up your bin.
To collect the castings, you’ll need another container as well as a plastic bag with holes punched through it. To ensure that the bag is taught over the entrance of the new container, place it over the top of the new container.
Place the new container in the sun and begin to fill it with the contents of your worm bin. Fill the bag to the top. Because they don’t want to be exposed to the light, the worms will burrow through the holes and into the new container.
You will be able to separate the castings from the worms in this manner. When you are through harvesting, place the worms back into their compost bucket to finish composting.
Composting Will Improve Your Gardens
With the addition of these widely accessible amendments (plant and animal waste) that are high in nutrients and have been broken down to make them available to the plants’ roots, your garden will profit significantly.
Increased water retention is achieved via composting, which also has a high concentration of essential micronutrients.
When you learn how to produce compost, you’ll quickly realize that it’s a simple process that you’ll wonder why you’ve never done it before. A step-by-step guideline on how to construct compost can get you started on the right track in no time at all.
Final Thoughts on How to Make Compost
Before beginning the process of creating compost, you must determine which method you will employ.
Each approach has its own set of stages and supplies that must be used; the length of time it takes to complete the project will vary depending on the way you choose. This decision is entirely up to you.
We hope you’ll all experience wonderful results.
Jennie Marie
Tribal Writer
Edited By
Patricia Godwin