
Nowadays, people love to do DIY or do-it-yourself projects because of the learning and environmental benefits that come with it. The possibilities are limitless when we talk about what we can do by ourselves, including making a carbon filter for a grow room.
To make a carbon filter for a grow room, you need to prepare two pencil holders and drill holes in the bottom of both of them. Then place the pencil holders inside the knee socks. Fill the larger pencil holder with activated carbon. Next, seal the activated charcoal between the pencil holders, and pull down the sock to the rim of the bigger pencil holder and then attach the setup to the ducting – and you’re done! Let’s expound on that:
Essential Items and Tools For Making A Carbon Filter
Of course, we cannot make a carbon filter without the items and tools needed to make the carbon filter.
Note that a carbon filter has four major parts and each part except the air passage has corresponding items. Here is the list of items and tools you need to make your carbon filter:
The Pre-Filter Items
• Over The Knee High Socks
• Polyester Filter Media
The Body
• Mesh Trash Bin (Outer Mesh)
• PVC Drain Pipe (Inner Mesh)
• 4.75″ Mesh Pencil Holder (Outer Mesh)
• 4″ Mesh Pencil Holder (Inner Mesh)
The Activated Carbon
• Bamboo Activated Charcoal (Small and Medium)
The Tools You Need:
• A pair of scissors
• Zip ties
• Measuring tape
• Drill Machine
The Steps To Make A Carbon Filter For A Grow Room
After knowing the components of a carbon filter and gathering all the essential items and tools, we can make a carbon filter. Note that the size of the carbon filter depends on the size of ducting you have.
Here, we will simulate a 4″ ducting setup adjust the size of the items if you have bigger ducting.
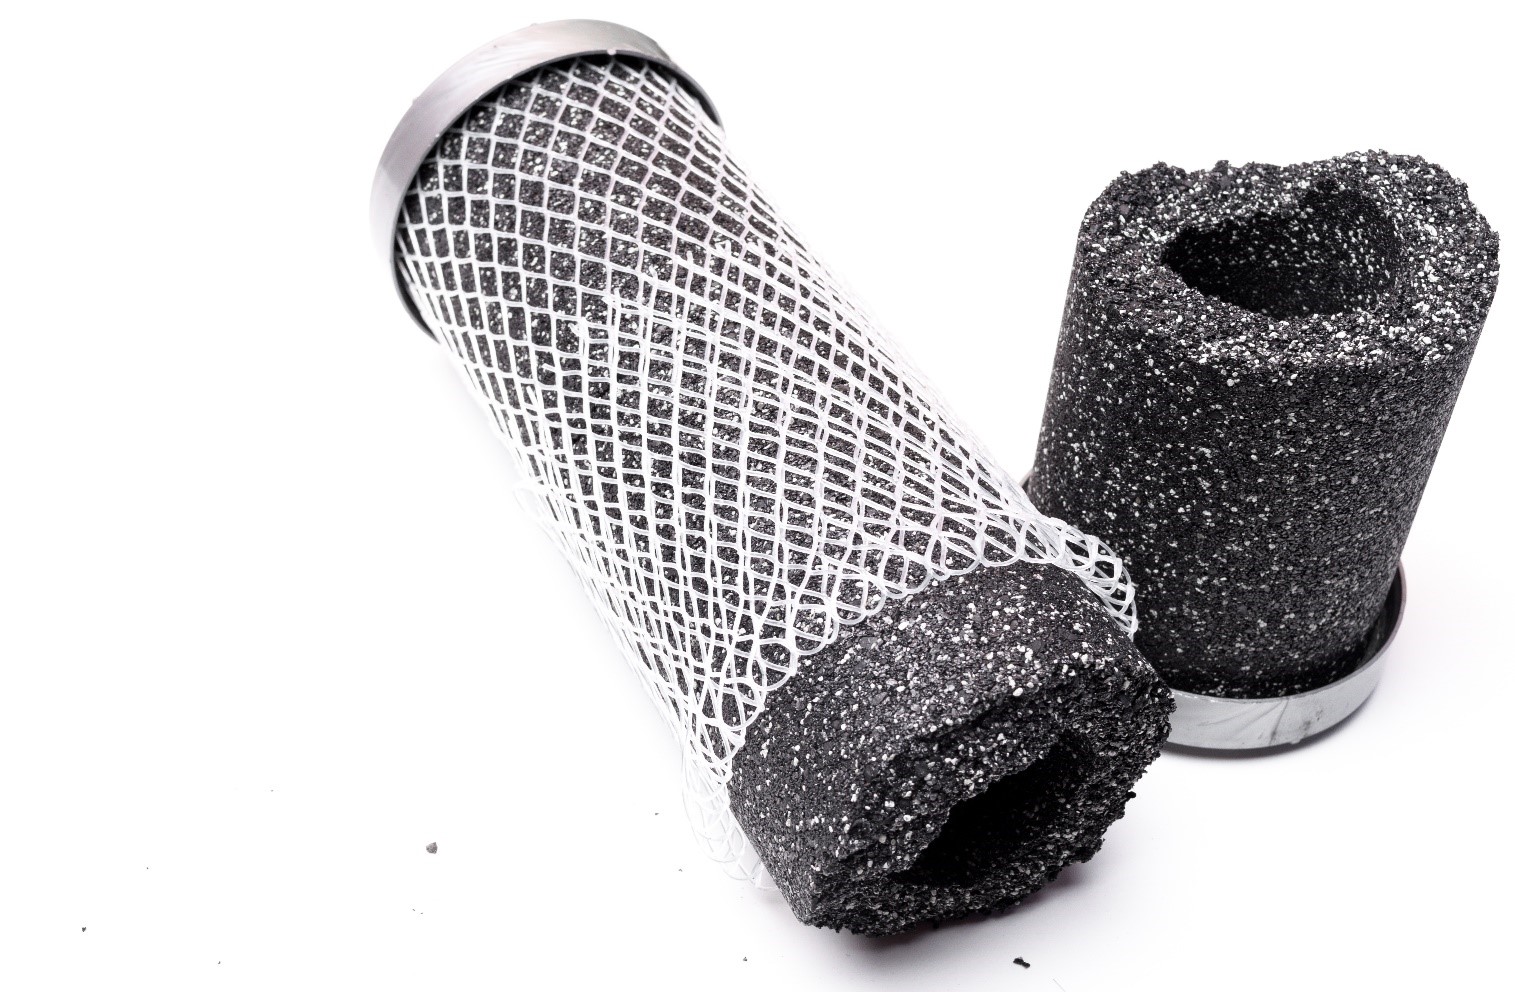
First Step: Prepare the Two Pencil Holders (4″ and 4.75″)
The reason behind the difference in size is because the smaller pencil holder will be placed inside the bigger one.
The two pencil holders are the pillars of the carbon filter. Hence the height, diameter, and distance of the two pencil holders should be perfect.
The rules to do this is simple. In terms of height, the smaller pencil holder should be about ¾ of the height of the bigger pencil holder, and the distance of the two pencil holders should be around 12-24mm.
Most importantly, the diameter of the smaller pencil holder should be the same as the diameter of the ducting.
Second Step: Drill Holes on the Bottom Part of the Pencil Holders
Drilling the bottom part of the pencil holders is to make them permeable from all sides. The ideal holes to drill in each pencil holder are between 8-12 holes and should be done uniformly to make them air-transparent.
However, pencil holders are quite delicate, and drilling them can be a challenge at times. You have to master the art of drilling them to create the perfect holes. You may use a 5/32 drilling bit because this complements the size of the pencil holders.
Third Step: Place the Pencil Holders Inside the Knee Socks
When putting the pencil holders inside the knee socks, make sure the socks do not tear apart. Gently stretch the sock’s opening and slowly put the pencil holders with the bottom first inside them.
See to it that they are uniformly covered with the sock and don’t tie it yet.
Fourth Step: Fill the Bigger Pencil Holder with Activated Carbon
Before putting in the activated carbon, make sure that the knee sock is tightly placed around the rim of the bigger pencil holder. Fill the pencil holder with activated carbon until it fills up half of the length from the bottom.
Furthermore, make sure that the activated charcoal is finely granulated and uniform in size. The size of the activated charcoal depends on the size of the carbon filter you plan to make.
Since we are making a small carbon filter, the activated charcoal should be small as well to avoid filtration problems.
Fifth Step: Seal the Activated Charcoal between the Pencil Holders
Since the bigger pencil holder has activated charcoal in it, the height of the smaller pencil holder will not be the same. Pull the knee sock from the rim of the bigger pencil holder until it covers the smaller pencil holder.
Afterward, place the smaller pencil holder in the middle and hold the setup upside down until the activated charcoal has evenly distributed within the gap of the two pencil holders.
Also, the sock should evenly coat the setup. Scan the setup to secure that the bottom part is filled with activated charcoal. Slightly shake the setup until everything is perfectly distributed.
Once everything is appropriately set, return the setup to its upright position. Adjust the opening and other parts of the design if necessary.
Sixth Step: Pull Down the Sock
Slowly and evenly pull down the sock towards the rim of the bigger pencil holders to reveal the opening. In this case, the height of both pencil holders is similar, and it should be maintained as you adjust the socks.
The pulling should be perfect even to make a clear edge of the middle cup with a secure end.
Seventh Step: Attach the Setup to the Ducting
The last step is to connect the carbon filter to the ducting by simply fitting the opening of the carbon filter into the beginning of the ducting. Seal the carbon filter by using a zip tie and twist it until it is entirely locked up.
Before you put them in the grow room, always double-check the connection and the carbon filter. If you are confident that everything is fallen into place, then you are good to go.
Change the carbon filter if you find out that it is not working anymore and just repeat the process.
The Anatomy of Carbon Filter
A carbon filter works by removing contaminants through absorption. Like a sponge with water, absorption soaks up particles.
Carbon filters are incredibly absorbent and have a large surface area, making them highly effective at reducing – bad tastes, odors, and other water particles.
They are most commonly used to remove gases. Designed to filter gases through a bed of activated carbon (also called activated charcoal), they are typically used to combat volatile organic compounds (VOCs) released from everyday household products.
It is easier for you to understand how every part of the carbon filter works. This will give you an oversight of the essential items you need to build a carbon filter.
Therefore, it would be reasonable to make your carbon filter. You don’t have to worry about anything because this article will provide you with information on how to make your carbon filter and other essential data about it.
Before anything else, we have to be familiar with the components of a carbon filter.
The best part of creating some of your equipment instead of buying it in-store is that you save a lot of money from the do-it-yourself process.
The average price of a carbon filter is about 100 bucks, and this is quite pricy for something that consists of material that only costs about 1/3 of its price.
1. The Pre-filter
The pre-filter, keeps dust particles and debris from entering into the carbon. The pre-filter provides an additional filtration within the carbon filter to ensure that every dust particle and any waste is filtered.
Moreover, the pre-filter has minimal air resistance but is breathable enough for the air to pass through the carbon bed. There is a transparent body that is placed around the carbon filter body.
2. The Body
The body keeps everything together and is made up of activated charcoal from the outer and inner mesh to secure dust-free air passing through the pre-filter.
Hence it’s responsible for the smell and odor-free air passing through the carbon layer and air passage.
3. The Activated Carbon
The activated carbon is responsible for most parts of the filtration process.
The charcoal, with numerous pores, will draw the chemicals that cause a smell inside them and release odor-free and dust-free air into the grow room.
4. The Air Passage
Lastly, the air passage is a cylinder-type object with two openings.
They are responsible for the airflow within the carbon filter. Hence the openings should have the exact diameter as the ducting and inline fan.
If the flanges and fans are not proportionate, it will ruin the whole carbon filter.
Final Thoughts:
The most important thing to remember when making a carbon filter is the size. Everything should be perfectly proportionate when it comes to carbon filters; otherwise, it will ruin the purpose of a carbon filter.
Another important reminder is to make the necessary adjustments if you plan to create a bigger carbon filter.
The steps provided in this article are enough to make a carbon filter, but you can still add some modifications to it – as long as it gets the job done.
For example, you can use duct tape to keep both pencil holders in place.
Because it is a do-it-yourself tutorial on making a carbon filter, It’s only a matter of what works for you.
Hopefully, this time, you are now confident to make your carbon filter for a grow room. Just take note of the essential steps, and you can expect a perfect carbon filter with less cost than the already made ones.
Jenny Marie
Tribal Writer
Edited By
Patricia Godwin