
Turmeric is a plant that belongs to the ginger (Zingiberaceae) family. It is a subtropical/tropical plant native to Southwest India.
Its roots, also known as rhizomes (horizontal underground plant stems that produce shoots, roots, and new plants), have been used as a spice, medicine, and a source of bright yellow dye for centuries.
To grow turmeric in cold climates, you must first select a planting location, prepare your containers, and select the right rhizomes for propagation. Then transplant your baby Turmeric plants and watch them grow. After two to four weeks, these plants are ready for the next step. Transplant them again and look after them until they are about two to three feet high. Now it’s time to harvest your Turmeric plants!
This article is for those who want to grow turmeric but live in the northern parts of the world, where the climate is cold. Here is how to grow turmeric in a cold environment step by step:
Step 1: Planting Location
Turmeric enjoys the light, but it is vulnerable to overheating. It thrives in full sun and partial shade. In hotter climates, it can benefit from some afternoon shade (when over 90 degrees).
In the late summer, gardeners use shade cloths to cover their turmeric plants. But, in other places, it is not necessary at all.
Turmeric may need the most water when actively growing, but only a tiny amount before sprouting.
If they have not sprouted, rhizome seeds are exposed to standing water or highly wet soil, and they are vulnerable to rotting. Turmeric rhizomes will take months to germinate and begin to grow when planted directly outside!
As a result, select a planting location with good drainage and the ability to change the amount of moisture they receive efficiently – particularly early on. It is not good to plant them in a place where water pools in the spring, for instance.
You can transfer your turmeric container around your garden to suitable locations if you are planting it in a smaller, mobile container. Similarly, when it is time to carry the turmeric inside in the late fall (for frost-prone climates), you can position it near a sunny window.
If you are planting your turmeric in the lawn, a raised garden bed, or a heavy, less-mobile container (like a wine barrel), keep the above considerations in mind when deciding where to plant it.Step
2: Prepare Your Containers
Do not spare on size while looking for a suitable container in which to grow turmeric. Get something as large as you can without being overburdened.
Alternatively, prepare several smaller pans. Turmeric does not require especially deep soil.
A depth of 10 to 12 inches is appropriate. If you want to harvest a good amount of turmeric, width and surface area are the most critical factors.
To grow well, the rhizome seeds you plant will need several inches of space between them. As a result, narrow containers can restrict the number of plants you can grow
Turmeric, like all plants, grows best in a container with good drainage. In other words, the chosen pot or pots must be pierced! In addition to wine barrels, gardeners grow turmeric in large fabric Smart Pots with excellent drainage.
They do, however, dry out more quickly, so keep that in mind when you start your water routine. Drip trays should be added as needed to capture runoff, particularly for indoor containers
Step 3: Selecting rhizomes for propagation
Getting high-quality, new, and organic turmeric roots from your local grocery store is the simplest way to get your turmeric plants started. Choose roots that are firm and young. You do not want roots that are soft, flimsy, or bruised.
You will need to buy a few rhizome pieces to grow this spice. Although you can grow turmeric from store-bought roots, it is difficult because the rhizomes might have been treated with a growth inhibitor to keep them from sprouting in the store.
You may be able to find rhizomes at a tiny, ethnic grocery store that imports roots that have not been treated with growth inhibitors.
Another choice is to locate a farmer who grows it. You can buy starter rhizomes from that farmer. Since rhizome pieces are so simple to propagate, once you have cultivated your original turmeric rhizomes, you can easily build up your stock.
Choose dense, solid roots with many tiny knobs on them—these knobs are the leaf buds—no matter where you get your initial turmeric rhizomes. Look for rhizomes with slightly green knobs if at all possible. That’s an indication that they’re about to sprout.
Step 4: Planting Your Turmeric
Cut or crack the turmeric rhizomes into 2-inch bits, then leave them to cure for a day or two at room temperature.
Fill a clean, plastic pot halfway with high-quality potting soil, then soak the rhizomes for a few hours in tepid water before planting them.
Place the rhizomes in 2 to 3 inches of potting soil, but not too deeply. Although turmeric can be planted at any time of the year, it performs best in the late winter and early spring.
After the turmeric rhizomes have been watered, place the pots on a seedling heat mat to speed up growth (the same kind you use to start seeds). It provides the rhizomes with the bottom heat they need to sprout quickly.
For 16 to 18 hours a day, place the pots in a bright window or under grow lights. There’s no need to put something on top of the pans. Remove the plants from the heat mat once they have sprouted.
Keep the containers well-watered. When the soil dries out, it prevents the rhizomes from rotting. However, do not let them sit in a saucer of standing water.
The rhizomes take two to four weeks to sprout. If they do not germinate, they have either been given a growth inhibitor or have rotted in the container. Replant with new rhizomes and fresh potting soil if this is the case.
Step 5: Transplanting and growing
The plants have hardened off, are happy, and are searching for a bigger and better home.
Now is your chance to give these plants everything they want to produce the largest and best harvest possible.
Continue to water and care for your new turmeric plants until frost is no longer a threat. After that, take the pot outside. In the afternoon, choose a partly shaded spot.
The plants can be transplanted directly into the field if you prefer. To increase the drainage and fertility of the soil, apply some compost before planting.
It is best to have a dappled afternoon shadow with morning light. Your seedlings can be transplanted into containers (minimum 10 gallons), grow bags, raised beds, or the field directly. Use decent potting soil or compost.
During the growing season, turmeric plants should be fertilized every few weeks. Kelp or fish emulsion are examples of organic liquid fertilizers.
The plant can reach a height of 2 to 3 feet as it matures.
Step 6: Harvest Time
Northern gardeners must bear in mind their first predicted frost date, as harvesting must occur before any possibility of frost. In the fall, some people will carry their container turmeric indoors to continue to expand. This also is a good idea.
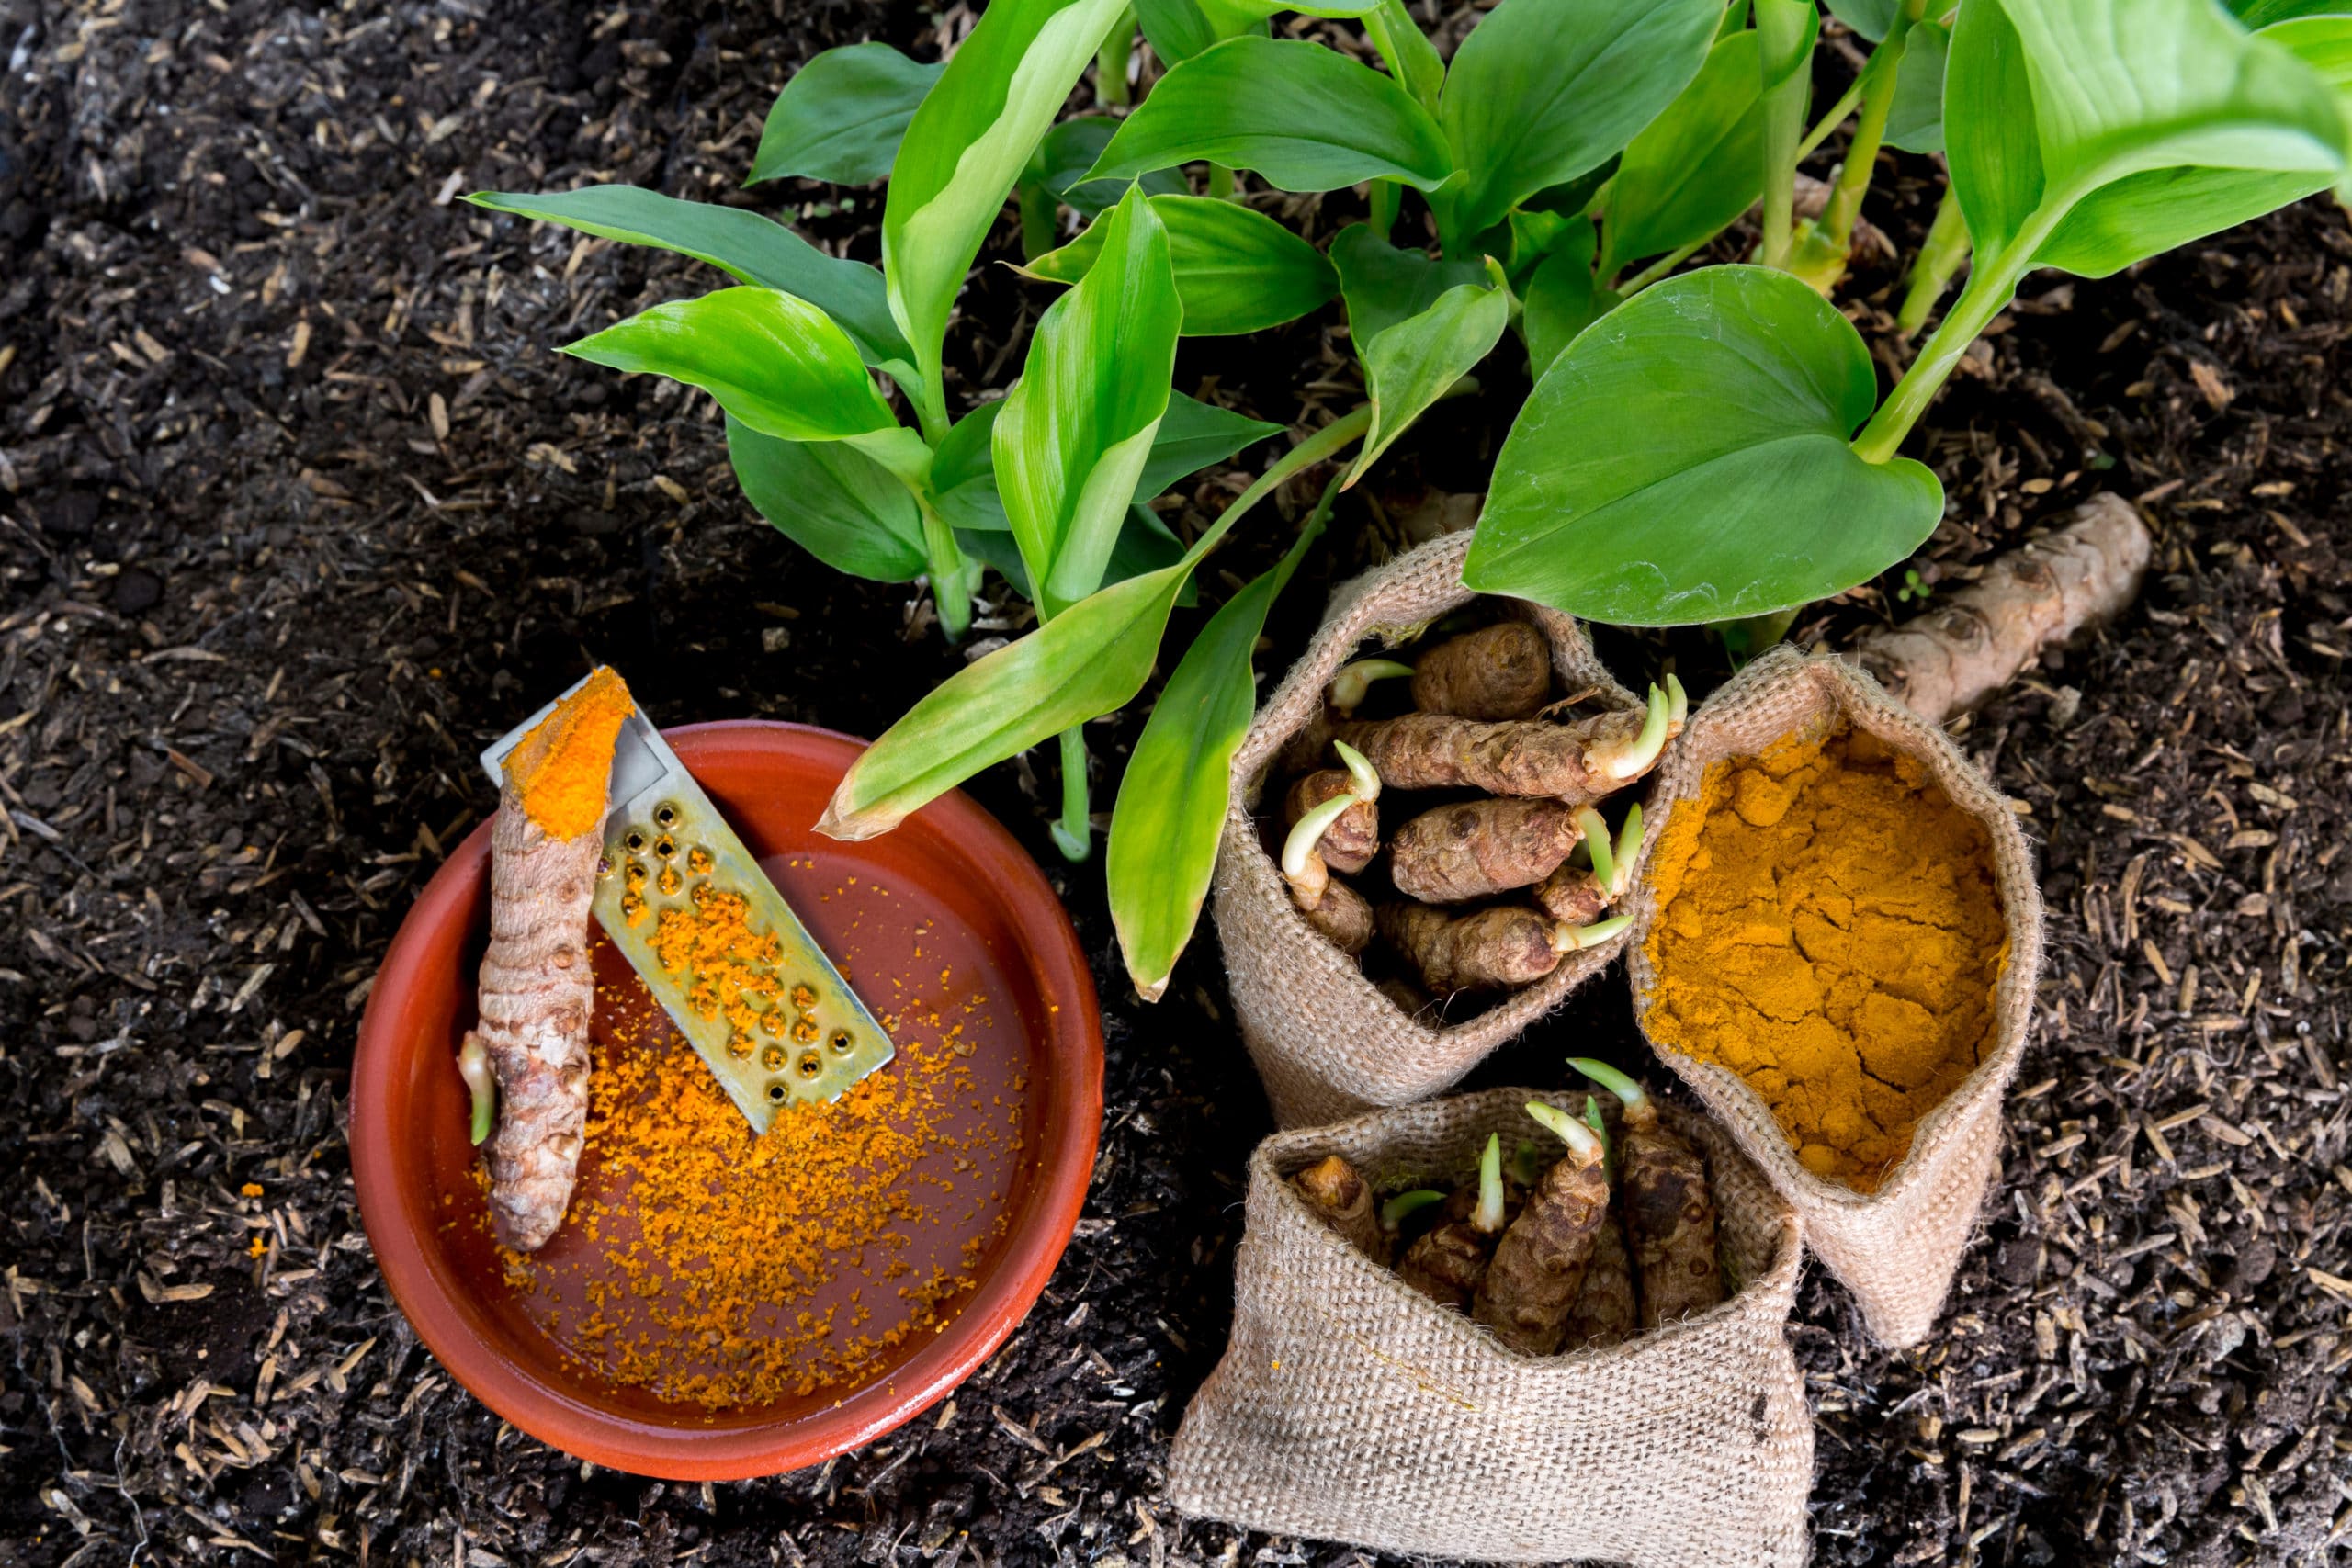
Dig up the seeds, brush away any excess dirt, and cut off all the greens just above the rhizomes to harvest. With your fingertips, break the roots apart. Keep the largest rhizome parts for cooking or selling to customers.
Save the smaller bits for replanting, but do not do so immediately. Instead, store the unwashed rhizome fragments in a cool, dark place in a plastic bag or jar.
Keep them there until late winter, when it is time to put them up and start the process all over again.
Turmeric has an eight- to ten-month growth period, and after that time, the plants will generally go dormant.
If you do not want to pick all of your turmerics at once, bring the potted plant inside before the first frost.
Continue to grow it on a sunny windowsill or under grow lights until the plant dies naturally.
You can harvest most of the roots after the plant has died entirely, but leave a few in the pot. The ones that are left in the pot will go naturally into dormancy.
Stop watering and let the potting soil dry out if this occurs. You can begin watering it again to promote another growth period; the rhizome will remain in the pot until late winter.
Some Uses
Curries, pickles, and other dishes get their color from the distinctive yellow pigment of the turmeric roots. Turmeric, on the other hand, does not need to be dried or pulverized before being used in the kitchen.
The flavor of the fresh root, whether grated or sliced, is mildly zingy and earthy, and it’s one of our favorites. Even though this species is native to climates much more tropical than those found in most of North America, it is possible to grow it here.
Turmeric is best to grow in mild to warm climates since it can be developed entirely outside. On the other hand, people in colder climates may also cultivate their turmeric in a mobile jar.
Final Thoughts
A very well-known spice, turmeric comes from the root of Curcuma longa. Interestingly it has many valuable properties, as listed below.
Because it contains a chemical called curcumin, it could reduce swelling
It is a significant anti-inflammatory and antioxidant
It is often used to treat conditions that involve pain and inflammation
People commonly use turmeric for osteoarthritis.
Use it for hay fever or depression, or high cholesterol, or liver disease snd even itching.
Turmeric is not to be confused with Javanese turmeric root or tree root.
Don’t confuse turmeric with Javanese turmeric root or tree turmeric.
Further, please don’t mistake it for zedoary or goldenseal, which are unrelated plants that are sometimes called turmeric.
Often used in curries, mustards, butter, and cheeses, turmeric has a warmish but bitter taste and adds a lovely yellow-orange colour.
Try it with vegetables, lentils, and rice dishes. Put it together with seafood or chicken.
Turmeric is such a health-giving spice and so versatile. It’s s must-have in the kitchen!
Jenny Marie
Tribal Writer
Edited By
Patricia Godwin