
Birds Eye Chili is a hardy plant that may be cultivated in any environment. It is highly sought after because of its numerous therapeutic benefits.
This guide includes instructions for growing Bird’s Eye Chili both indoors and outdoors. Details include planting, growing, planting out, seed trays, care, harvesting, and hibernating.
Guide in Growing Bird’s Eye Chili Outdoors
Birds Eye Chili is the most popular chili on the market right now.
Because it does not need any considerable attention, its cultivation is unique in that it is easy to maintain. This crop does not necessitate scientific fertilizer applications or crop care techniques.
Step 1: Plant a Bird’s Eye Chili Seed
Although you may purchase existing plants from your local garden shop, growing chilies from seed provide a wider variety of options and can be very gratifying.
If possible, schedule the planting chore as one of your first jobs of the year; the longer the seeds are allowed to develop, the greater your chances of reaping a rich crop are.
Starting with tiny pots of pre-watered seed compost, scatter seeds over the compost surface and cover with more compost or vermiculite to provide a nutrient-rich environment.
When it comes to some types, germination can be unpredictable, so start with a few seeds in each pot and, if they both germinate, remove the weaker of the two.
The most crucial necessity for chili seeds is heat.
Use cling film to cover your seeds and set them in an airing cupboard, on top of a freezer (the surface of the freezer provides a consistent temperature that is good for seed germination), or another warm and dark location of your choosing.
When your seeds have germinated, they will require the maximum sunlight and warmth you can provide for them. The best option is to employ heated greenhouses, although your sunniest windowsill can do as a substitute.

Step 2: Wait for the Bird’s Eye Chili to Grow
Heat and light are essential, and while you’ll need to water them regularly, they don’t like getting saturated like a native British plant. Continue to water them regularly; they will survive brief periods of drowning. Spray their leaves with a light mist to simulate a hot Mexican atmosphere if you have the opportunity.
When your chilies have grown to be large enough to handle, have a stem that does not readily flop, and have a few sets of their correct leaves, you may transplant them into larger containers.
They may even outgrow them before they are ready to be moved to their ultimate placements, so you should consider increasing the size of their houses if they appear to be hindered or if their development appears to be stalling.
Step 3: Planting the Bird’s Eye Chili Out
The majority of cultivars may be grown effectively outside in a protected, sunny location and with a generous amount of organic compost.
If you intend to relocate your plants to the outdoors, be certain that all danger of frost has passed and that they have been progressively acclimated to the colder temperatures for at least a week before their permanent relocation.
Any additional warmth you can provide them will enhance their size and productivity, whether via covering them with polyethylene, growing them in a polytunnel, or providing them with the closest climate possible to tropical chili heaven, a greenhouse.
Of course, you may continue to maintain the plant indoors on a sunny windowsill for the time being.
Guide to Growing Birds Eye Chili Indoors
1. Prepare a Tray for the Seeds
A drainage hole must be included in your seed tray.
Preparing the Potting Mix is next.
You may use natural fertilizers in your gardening mixes, such as cow dung or composted basal manure, to maximize results—this aids in preparing your soil for the growth of chili plants.
2. Scatter Your Chili Seeds on the Seed Tray to Dry
To plant the chili seeds, put on gloves and poke them into the soil. Water only as required, and keep the soil wet at all times. Avoid pouring the water straight into the soil, since this may wash away the seeds from the soil. Softly sprinkle the water on the plants for the most pleasing effects.
3. Put in Mind That Birds Eye Chilli Seeds Enjoy Being in a Warm Environment
If you do not have access to a propagator, you may cover your seed tray with clingfilm and store it in an airing cupboard for a few days. Alternatively, because the surface of your refrigerator might radiate heat, you can set your seed tray on top of the freezer.
4. In a Few Weeks, the Seeds of Your Birds Eye Chilli Plant Should Sprout
Once the seeds have germinated, they must be moved to an area that receives plenty of sunlight and provides additional warmth.
If you intend to grow many chili plants, you may want to consider investing in a heated greenhouse. However, if you only have a pot, you may put it outside to grow.
The Benefits of Growing Birds Eye Chilli?
According to research, birds’ Eye View Chili is more immune-boosting than other chili kinds. After it has grown, it can be transferred when it has four leaves on the bottom of the plant.
Cultivation can be begun by incorporating cow dung or compost into the soil or grow bag as a basal manure source. Fermented oatmeal is combined with double the amount of water and put over this plant to accelerate its development.
In the heat, it is essential to water your plants. You may also grow it as an intercrop on your farm, to begin with.
In most cases, insect pests do not affect this kind of chili. Birds Eye Chili is a powerful bio-pesticide in and of itself.
Farmers have been employing a concoction containing chili to repel pests since dawn.
General Information
The bird’s eye chili is native to Africa, and in certain locations, it may even be found growing in the wild. However, this is becoming less common as agricultural land is used for farming.
The fact that they are compact makes them ideal for commercial cultivation, but they also yield an abundance of fruit.
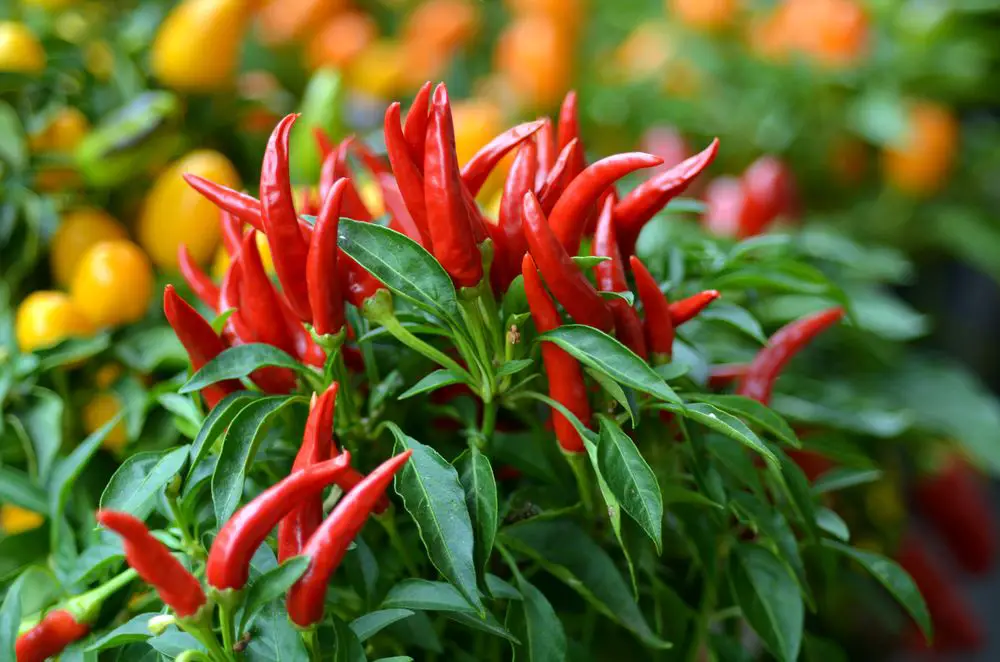
The fruits, which are around 5CM long and red in color, create a moderate heat of approximately 100,000 on the Scoville Scale, making them suitable for use in a wide variety of commercially manufactured meals, including soups and sauces.
Growing the wonderful bird’s eye chili, also known as the Thai Chilli or the Thai Dragon, has several advantages.
One of the most significant advantages is just gardening, which has several health benefits in and of itself.
Gardening, according to Healthline, may help improve your mood, strengthen your immune system, decrease stress, and may even aid in the recovery from addiction – to name a few of the advantages.
Chili plants are also a fantastic choice for gardeners because the fruits are both delicious and nutritious. Growing your food also provides a genuine sense of pleasure and pride.
When it comes to utilizing your organic fruit, the bird’s eye chili is quite adaptable and can be used in both sweet and savory dishes as well as beverages, such as chili hot chocolate, among other things.
If you don’t want to use them immediately, you may dry them yourself or make them into a chili powder or sauce to store for later use. The options are virtually limitless.
To top it off, when you consume bird’s eye chili, you receive an increased intake of vitamin C and antioxidants, which can help reduce inflammation in the body and aid weight reduction if consumed in moderation (as recommended).
Caring Requirement for Bird’s Eye Chili Growing
When it comes to chilies, four things are very crucial to remember. That would include warmth and sunlight, soil, water, and fertilizer, to name a few things.
Chilies are doomed if they are submerged in water. This may be avoided by using well-structured soil enabling air to reach the roots of the plants.
Root development is ensured, for example, in tomato soil that has been blended with coconut fibers. Never go overboard with the watering.
Please have a look at this article to learn how to tell when it is time to get some freshwater. You will also learn all you need to know about water at this location.
Chilies are believed to have originated in the Caribbean. Bird Eye Chilies are found in warm climates in Africa and Asia.
Give the plant the respect it deserves by placing it in an area with acceptable humidity, warmth, and light. Plant lights may be of great assistance during the long, gloomy months of winter.
Harvesting Bird’s Eye Chili
The color of your chili’s changes from green to red around 90 days after they have bloomed and been fertilized.
Many chili farmers, especially in their first year, feel frustrated because they believe the chilies will remain the same hue forever. Patience is essential in this situation. Producing the meat, placenta, and especially the seeds takes a long period.
Pay close attention to the initial discolorations that appear on the crown or tip of the hair. If it is employed in this context, it is a pretty lightning-fast system.
You should allow the red pods to hang for at least five days for the fructose, spiciness, and scent to develop to their maximum potential.
Hibernating Bird’s Eye Chili
The chili plants Capsicum annuum and Capsicum frutescens are both perennials. The term “annum” refers to a calendar year, although you can disregard it.
When the botanical names for the Capsicum genus were assigned more than 200 years ago, a few inconsistencies crept into the classification system.
Depending on their needs, both species can hibernate 2–3 or 5–8 times.
There should be no frost. Already at night temperatures below 10 degrees Celsius, the plants are beginning to show signs of distress.
Consequently, you should begin making preparations for wintering over in October and continue throughout the winter season.
Final Thoughts on How to Grow Bird’s Eye Chili
The cultivation of chilies is one of the most enjoyable and gratifying gardening endeavors, giving color to the garden or windowsill while also providing a range of fiery tastes to the kitchen.
With a little knowledge, it is usually much easier to avoid frequent chili plant growth blunders and begin enjoying a successful growing season almost immediately after starting.
The techniques and information provided above should prepare you to grow and harvest bird’s eye chili peppers throughout the season, allowing you to create an unlimited number of hot and tasty recipe combinations to test out and offer to your family and friends. Some like it hot!
Read More:
