
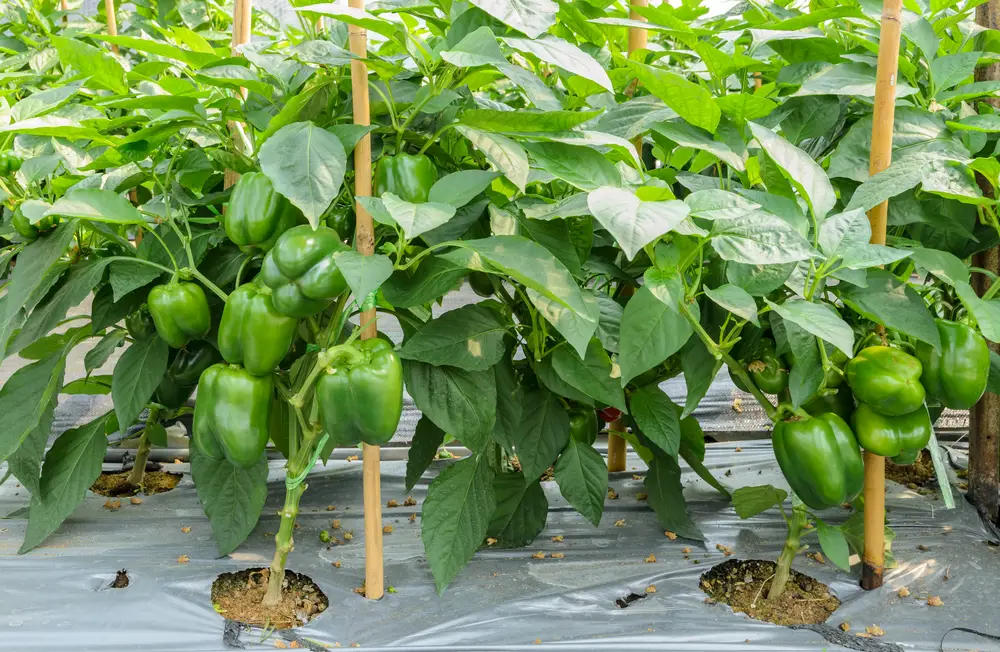
Bursting with flavor, and looking bright and vibrant, everyone enjoys eating Bell Peppers raw or stuffed and cooked. Being sweet or spicy, bell peppers are colourful in their spicy green, sweet red and even sweeter yellow types, and they contain vitamins!
There’s four steps in growing bell peppers from seeds. These are: seed preparation, soil preparation, indoor planting, and transplanting. They’re relatively easy to do; so take note of all the info in this comprehensive article, and you’ll soon have baskets full of your own colourful, home grown bell peppers ! Let’s get to it…
How To Grow Bell Peppers From Seeds
1. Seed Preparation for Bell Peppers
The first step is to prepare the seeds for planting. You can buy them either from online stores or physical garden stores near you. But you can also get them free from your gardener friends who grow bell peppers. Or, you can….
Select the healthiest pepper for harvesting seeds. It would be best to get the healthy bell peppers from a local gardener and not from the supermarket because they are oftentimes sterilized.
Also, don’t choose the hybrid peppers because they’ll have different characteristics when grown.
Anyway, starting from scratch is more educational and exciting.
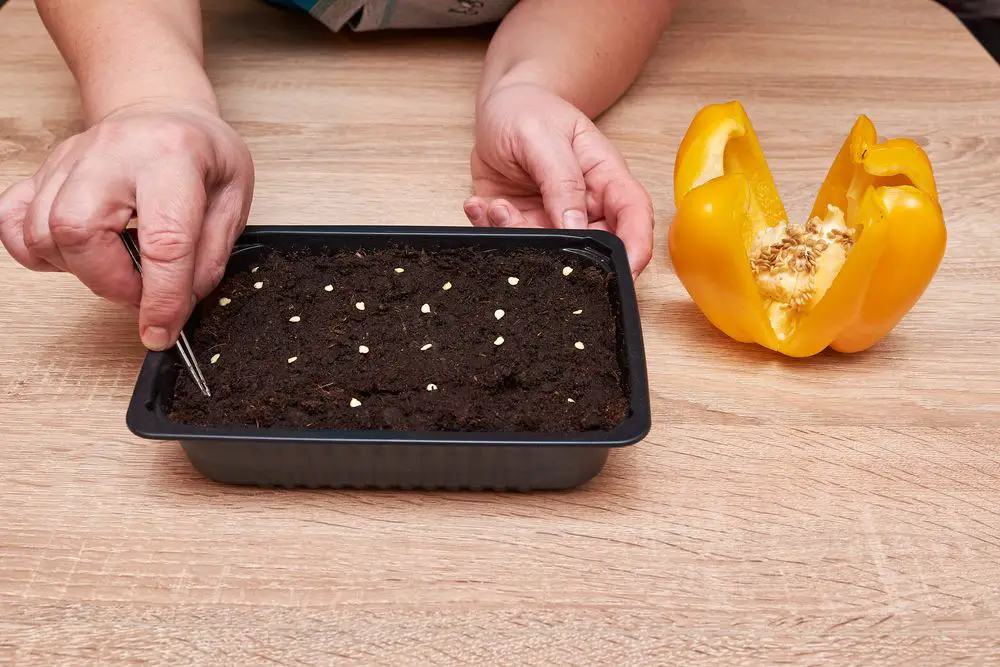
Next, harvest the seeds by cutting the top portion of the bell pepper.
After cutting, scoop the seeds out using a spoon. Clean the seeds by removing any debris and spread them on a towel.
Afterwards, put all the seeds on a single plate and place them out in the sun or on a sunny window ledge for five to six days.
Drying the seeds helps harden the seed and prevents contamination when planted in the soil. Be sure to check on them once in a while when drying outdoors because we never know when birds are attacking.
Once the seed has dried, gently place them in an envelope. Label the envelope so you can easily recognize them when it is time for planting. Store them in a dry location.
2. Bell Peppers Soil Preparation
When the spring arrives, it is about time to start preparing the soil for planting. But before that, growing pots should be ready beforehand because this is where the soil is placed.
Bell pepper seeds should be grown indoors before they are transplanted outdoors and the only way to do it is by planting them in a growing pot.
They love loamy soil because they are filled with organic matter and rich in nutrients. You can buy such mixture from a local garden shop near you or make your mixture. Just gather all the elements and combine them with the local soil.
Also, the acidity of the soil should be taken into consideration. A soil pH right around 6.0 to 6.8 is the ideal environment for bell peppers. Mix some coffee grounds in the soil to balance the pH levels of the soil.
Tip: Crush some eggshells and mix them in the soil. This is an extra nutritional boost that prevents blossom end rots.
3. Bell Peppers Indoor Planting
After preparing the seeds and soil the next step is none other than planting them indoors. The soil temperature required for the seeds to germinate is around 70 degrees Fahrenheit. Planting them indoors gives them the opportunity to grow in warm areas.
Plant the seeds about ¼ inch deep into the soil. After that, place the growing pots in a warm room. Gently separate the seedlings before they become leggy and replant them in cases where they get a bit tall. Keep them warm until they are ready for transplanting.
Bell peppers need plenty of light for healthy growth thus placing them in a location with enough access to sunlight. It could be a greenhouse, conservatory, or near the windowsill. Anything that keeps them warm and bright.
When the seedlings begin growing true leaves, they are now ready for transplanting.
4. Transplanting Bell Peppers
The last step in growing bell peppers is transplanting. This is the time they will be introduced to outdoor environments and settle until harvest season arrives.
But first, there are things to keep in mind before transplanting bell peppers.
First, the planting site should have good access to sunlight where big trees and other plants will not shade out the bell peppers. This is the secret to producing large and healthy bell pepper fruits.
Second, the soil should have a well-draining system and be slightly acidic. The quality of the soil should be consistent to avoid facing problems in the future. An acidity of 6.0 to 7.0 is acceptable and do not forget to mix organic matter in the soil.
Third, introduce fertilizer to the soil one week before transplanting. Also, you can put a slow-release fertilizer for maximum growth. This is the last preparation before proceeding to the actual transplanting.
To transplant bell peppers outdoors, be sure the plant has hardened off 10 days prior to transplanting. After that, check the temperature of the soil and adjust until it reaches 16 degrees Celsius.
It is important to transplant bell peppers under the right conditions because they are quite sensitive.
Next, space the bell peppers 18 to 24 inches apart so they have enough elbow to grow. Upon transplanting, make sure to dig not deeper than they were planted in the pots so avoid root rot.
Tip: Speed up the warming process by covering the soil with black plastic or dark mulch for a week before transplanting.
How To Maintain Bell Peppers
Your duties don’t end here, after transplanting. You still have to care for and maintain them until they bear fruits. Here are the things to remember for the maintenance of bell peppers:
1. Bell Peppers Watering Requirements
The golden rule when growing bell peppers is to never overwater them. They do not like wet environments and rather prefer moist soil conditions. Water them once every week.
This is not a standard schedule because the moisture in the soil is subject to weather conditions. For example, the moisture in the soil during winter evaporates more slowly than in summer. To be safe, let the soil dry before watering them again.
If you grow them in pots, make sure the pots have enough holes for drainage. After watering, you should notice the water flow outside of the pot. If no water is draining then immediately replant the bell peppers using well-drained soil.
Tip: Always check the soil before watering. The soil should be dry 2 to 3 inches from the surface. Do this process in all weather conditions to keep bell peppers happy.
2. Bell Peppers Temperature Requirements
During the early stages, bell pepper plants need to be in warm and bright condition. However, as they grow older, they should be exposed to full sunlight for better fruit production.
In cases of extremely cold temperatures, move the bell peppers to a room where they are protected. If you grow them from the ground, install a greenhouse around them.
3. Bell Peppers Fertilizing Requirements
Bell peppers are heavy eaters which means they need a regular supply of liquid fertilizer that is rich in potassium. Feeding them regularly helps promote flower blooming and fruit production. You can also use a tomato fertilizer or liquid seaweed to feed bell peppers.
Note that failure to feed bell peppers alongside overwatering causes yellowing of leaves. Hence, if your bell peppers are having yellow leaves as of the moment, just decrease the amount of water you give them and apply fertilizer. It should solve the problem.
Tip: After the first batch of fruit, apply a low-nitrogen fertilizer to encourage flowers and fruit growth instead of foliage.
4. Bell Peppers Pest and Disease Management
Bell peppers are highly susceptible to pest attack and disease infection if not cared for properly. It is necessary to be informed about the pest and diseases associated with bell peppers and how to manage them.
Fungus
Whenever the bell peppers are showing signs of yellow, brown, black, or purple spots on the skin and dark spots on stem and fruit; that is actually the symptoms of fungal infection. The spots will eventually be developed into a pink, gelatinous substance leading plants to rot if left untreated.
Solution: Remove the infected plants and improve the drainage system of the soil. Avoid overhead watering as much as possible and apply organic compost for a nutritional boost. Alternatively, apply mulch around the area and learn how to do crop rotation.
Aphids
This insect is responsible for distorting flowers and fruits as well as yellowing leaves. If you notice a substance like honey, that is actually excrement produced by aphids. It is your indicator that aphids are infesting your bell peppers.
Solution: Using a water spray with insecticidal soap, knock the aphids off of the bell peppers. After that, wipe the leaves with 1-2% dish soap liquid solution. Put banana and orange peel around the plant to discourage aphids from coming back.
Additionally, growing bell peppers together helps in attracting aphids away or planting something that has a strong scent like basil and rosemary because they are effective in keeping the aphids away. If you want to go extreme, you can grow a plant that attracts aphid predators and let them do the work for you.
Nutrient Deficiency
This is a common disease faced by bell peppers whenever they are not given a sufficient amount of calcium. The symptoms are dark spots on the end of the fruit that will eventually rot.
Solution: Remove the infected plant to avoid contaminating the healthy ones. Maintain the required conditions for soil, watering, temperature, and pH level. Do not apply too much nitrogen.
Flea Beetles
These insects are responsible for the countless tiny holes in the leaves. The tiny holes are very noticeable because of the number of holes.
Solution: Use row covers because they can physically block flea beetles and apply a good amount of mulch around the area. Alternatively, plant something near the bell peppers that attract flea beetle predators.
Bell Pepper Background
Before we proceed to the proper procedure of growing bell peppers, it would be better to get familiar with bell peppers first to know what you are dealing with. There is no need to worry because bell peppers are easy to understand.
The history behind bell peppers can be traced back as old as the time of Christopher Columbus (who is responsible for its name) and other Spanish explorers who were searching for ingredients back in the day.
They originated in Mexico, Central and South America. Christopher Columbus then took the several varieties of peppers to Central Europe where they became popular and later to Africa and Asia.
Moreover, bell peppers are produced from a flowering plant and contain seeds which technically means they are fruits but most people regard them as vegetables. They go by the scientific name of Capsicum annum and Australia is the only country that calls them Capsicum while the rest of the world sticks by the name “bell peppers”.
You’ll find sweet, bell, and hot peppers. In countries such as Australia. The term capsicum is generally used to refer to any peppers that don’t contain heat, such as sweet or bell peppers, whereas spicy peppers tend to be referred to as chili peppers.
Equally important, bell peppers change color. Green bell peppers are not ripe and they all start from this color. They will eventually turn to red and then to yellow.
Each color stage of bell peppers possesses a different nutritional value. For instance, red bell peppers have twice vitamin C as green bell peppers. Nevertheless, they are a good source of vitamin A.
Bell peppers are one of the great choices to grow whether large-scale farming or simple backyard gardening.
Nowadays, bell peppers have made a good image in the international market. In fact, many countries like Florida, California, Texas, New Jersey, and North Carolina are the major suppliers of bell peppers in the world.
However, Capsicum is the name of the genus that the plant comes from which includes sweet, bell, and hot peppers.
Final Thoughts on Bell Peppers
Growing bell peppers from seeds undoubtedly require a lot of light work and regular checking. But this is not something that should discourage you from growing bell peppers. It is only a small price to pay in exchange for delicious bell peppers.
They are warm-weather crops which means they thrive under balanced temperature
Conditions; crunchy and can be eaten raw or cooked. They can also be dried which speaks for the versatility of this crop.
That being said, what is the proper procedure for growing bell peppers? Luckily, this article will give you useful tips so you can grow bell peppers with ease. Bell peppers are known for their resistance when it comes to garden pests hence growing bell peppers is going to be an easy ride.
Jenny Marie
Tribal Writer
Edited By
Patricia Godwin