
Spring Asparagus is one of the first vegetables to be harvested in the garden since it is one of the earliest vegetables ready to harvest in the spring, and one of the few crops that can be cultivated year after year.
Here is a compendium of details about the growth and care of Asparagus. We discuss propagation, early growth, seasonal growth & harvest, preparation of the bed, light, soil, water, temperature and humidity, fertilizer and even transplanting; diseases and pests, and storing, freezing and drying. Can you ask for anything more?
The Growth Cycle of Asparagus
It’s critical to find a spot where it will have all of the growing conditions it requires because it will be in the same spot for years.
It takes three to five years for Asparagus plants to fully mature and fill out, but the effort is well worth it in the end.
The Asparagus harvest will last for more than a month every spring once they get into their stride, so start early and harvest often.
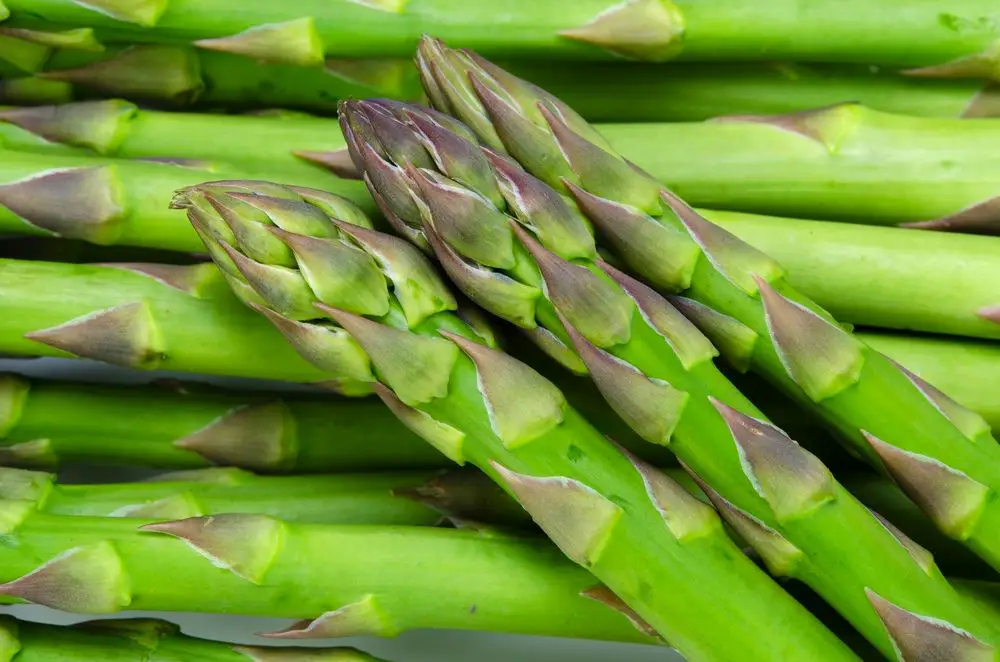
With scale-like tips, Asparagus spears are young, straight shoots of the plant that are harvested when they are young.
Later in the season, the foliage matures into an airy, light-green, fern-like cloud, which changes to a golden color in the autumn. Early spring is a good time to plant this perennial from its roots or crown.
Asparagus Propagation
Most home gardeners prefer to use 1-year-old crowns of Asparagus rather than seeds. Nurseries and commercial growers grew these crowns or roots from seed, which they then transplanted.
You can save money by growing the plants from seed yourself, but it will take an extra year before you can harvest the tasty spears that result.
Typically, the crowns are brown and small and are sold in a combination of peat moss and plastic bags. Initially, they don’t appear to be much, but they quickly grow.
A healthy, long-lived Asparagus patch is ensured by purchasing certified disease-free crowns from a reputable grower. If the roots are dry, shriveled, or soft, steer clear of the plant.
Early Growth
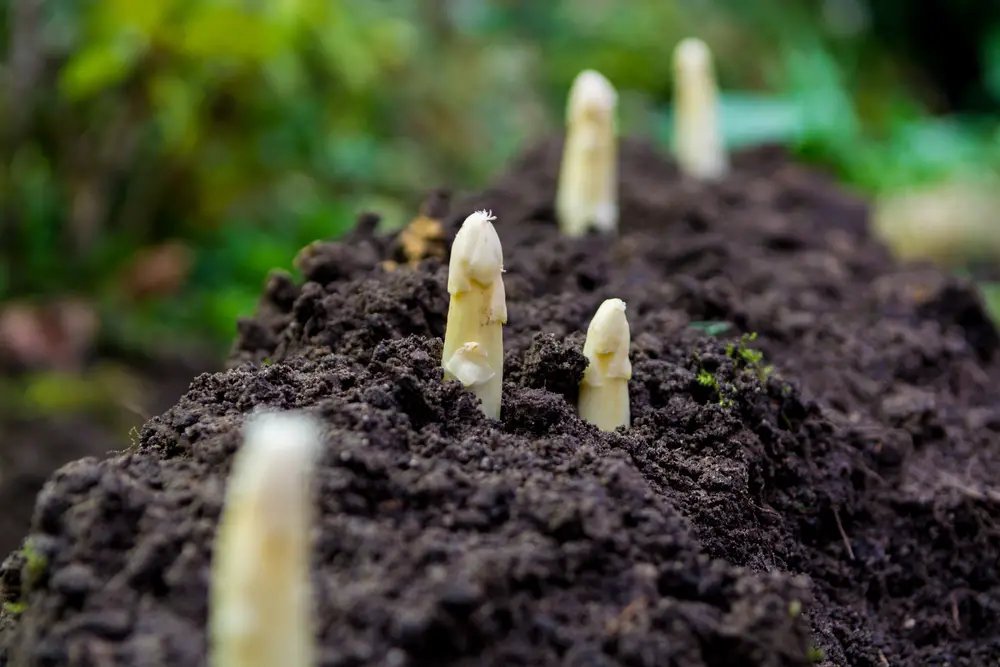
Small spears of Asparagus emerge from the ground a few weeks after you’ve planted your Asparagus plants.
For the first season, do not harvest these tiny spears. Keep the plants intact to encourage strong, deep root formation, which will result in higher yields later in the season.
Gather spears for four to six weeks during the second season of harvesting.
For four to eight weeks after the second year, or until the Asparagus spears are the size of a pencil, you can harvest Asparagus spears.
When it’s warm outside, the season is influenced by air temperatures, and the harvest is finished earlier.
Seasonal Growth & Harvest
A fascinating and predictable growth pattern can be expected from Asparagus, which is a perennial vegetable. Early spring is when the young, edible spears appear.
Plants develop into tall and ferny structures once the warm weather arrives. They’ve spent all of their energy in the root system by the time autumn arrives.
Because of the colder weather, they turn brown and dry out quickly. If you want to encourage a dormant period, you can cut them down to the ground now.
Preparation of the Bed
Gardeners used to prepare an Asparagus bed by digging an 18-inch-deep trench and backfilling it with a mixture of compost and soil, as shown in the photo above.
Planting today’s improved varieties of Asparagus is less labor-intensive (6″ to 12″ deep is sufficient) and results in nearly twice as many spears per plant as in previous generations.
These hybrids are all-male cultivars, which means that no energy is wasted in the production of seeds, increasing yield.
To successfully plant a new Asparagus bed, it is critical to completely remove all weeds and grasses from the planting area, even if this requires a full year of preparation in advance of the planting season.
Competing with weeds is something Asparagus plants are not used to. Even though Asparagus can occasionally be found growing in a ditch among the tall grass, the domesticated varieties will not thrive in their natural habitats.
A Guide In Growing Asparagus
Arranging for the harvest to take place over three years necessitates some patience and planning.
You’ll need to choose a spot in the vegetable garden that’s out of the way, where there are no competing plants because Asparagus is a perennial.
It’s also important to give Asparagus some room to grow! Depending on their size, space them 12 to 18 inches apart in your garden.
Their initial spread will be limited for a few years after they have become established, but they will quickly fill in the gaps once they have established themselves.
Because they contain both male and female plants, they will produce seeds and self-seed, heirloom varieties requiring additional space.
Some of the more recent hybrid varieties have been selected to produce only male plants that do not produce seeds, requiring less space because they will spread only through the growth of an existing crown.
The best time to start plants from seed is about four weeks before the last anticipated frost.
If you decide to plant seeds, expect to be waiting several years.
When growing Asparagus from crowns, which are readily available in the spring, most people find it easier.
Crowns have the appearance of a worn-out string mop, but they are still very much alive and kicking.
For the most part, the roots of Asparagus crowns can withstand some exposure to the elements, which is why they are often sold in loose form. In contrast to withered or mushy flowers, they should be firm and vibrant in appearance.
Trap-planting Asparagus crowns are the most common method of establishing the plant. During the spring, dig a trench that is approximately 12 inches deep by 12 inches wide.
Compost, fertilizer, or other organic matter should be combined and placed in mounds approximately 18 inches apart.
Place the crown of the plant on top of the mound and spread the roots down the sides of the mound as well. The crown should be approximately 6 inches below the soil line at its highest point to be effective.
Using soil, completely cover the crown and water it. To prevent the trench from becoming overfilled, continue to add soil until it is filled and flush with the soil line.
Prepare the bed by removing weeds and continuing to weed while the Asparagus plants are growing.
Weeds are difficult to remove from Asparagus roots because they form a tightly woven mat. To keep weeds under control, mulch should be applied to the Asparagus bed.
Other plants should not be added to the Asparagus bed because they do not like competition for nutrients.
Guide In Taking Care of Asparagus.
Asparagus Light Requirements
When growing Asparagus, full sun is ideal. You will end up with thin spears and weak plants that are more prone to disease if you do not get enough daily sunlight in your garden.
Asparagus Soil Requirements
Taking the time to improve your soil before planting a long-lived perennial like Asparagus will pay dividends.
Increase organic matter incorporation and ensure that the pH of the soil remains neutral (6.5-7.0). Remove any weeds and large stones that may have accumulated in the area before you begin to plant.
A well-drained soil ensures that the plants are never drowned by standing water.
Asparagus Water Requirements
To keep your Asparagus plants healthy, you should water them regularly, especially when they are young. Give them 1 to 2 inches of water per week during their first two growing seasons, and 1 inch per week when they are older.
Giving them a good start when you first plant them will result in fewer problems in the following years. Consider adding drip irrigation or a soaker hose to the Asparagus bed to keep the plants healthy and productive.
Asparagus Humidity & Temperature Requirements
A temperature range of 70 to 85 degrees Fahrenheit during the day and 60 to 70 degrees Fahrenheit at night is ideal for Asparagus during the harvesting season. After 50 degrees Fahrenheit in the soil, it will begin to sprout shoots in the springtime.
If there is a frost after the shoots have begun to grow, the color will become discolored. If the temperature is above 85 degrees or below 55 degrees, you may notice slower growth.
Asparagus Fertilizer Requirements
Compost and all-purpose organic fertilizer should be added to the trench when preparing your Asparagus bed, also add rock phosphate, which is a natural mineral powder that encourages root growth.
These nutrients will aid in the development of a healthy and robust root system in your Asparagus.
Every year, apply compost to the soil to keep it rich and to aid in the feeding of the Asparagus plants.
This can be done in the early spring before the new shoots appear, or in the fall after the fronds have died back and been cut to the ground, depending on when the shoots first appear.
You should fertilize your Asparagus in the middle of the spring when it is actively growing because it requires a lot of nutrients to survive.
Transplanting Asparagus
Transplant Asparagus crowns in early spring when they are dormant or in late fall before the first fall frost if you must move the Asparagus (after the foliage is cut back).
Using a garden fork, dig and lift the crowns, taking care not to disturb any roots along the way. Partition the mass into two or more equal-sized chunks of meat. Transplants that have received water The following year, do not harvest as heavily.
Overwintering Asparagus
Every year, before the new growth begins, Asparagus plants must be cut back to the ground. Choose your schedule.
After the leaves have turned yellow and died back naturally in the fall or winter, you can cut the stalks off. Pests such as Asparagus beetles are prevented from overwintering in the stalks by removing them as soon as they appear.
It is preferable, however, to leave the stalks standing through the winter, because plant debris can act as a snow-catching device for the Asparagus crowns, which helps to keep them safe from freezing weather.
In any case, the dead stalks must be removed in the spring before the new growth can be established.
Asparagus Common Diseases & Pests
While growing Asparagus in the garden, there aren’t many issues.
Fusarium wilt can be a problem with older varieties, but you can avoid it by planting resistant hybrid varieties of the same cultivar.
The Asparagus beetle is by far the most destructive pest in the garden.
If you see spears emerging in spring, keep an eye out for them. It is during the afternoon hours that they are the most active. If there are only a few beetles, pick them up by hand and drop them into a bucket of soapy water.
In any other case, diluted Neem oil should be sufficient to keep them at bay.
Guide In Resolving Problems of Pests & Diseases in Asparagus
For good root and spear production, Asparagus foliage must be in good health.
Among the most common pests are Asparagus beetles, which eat spears in the spring and attack foliage in the summer.
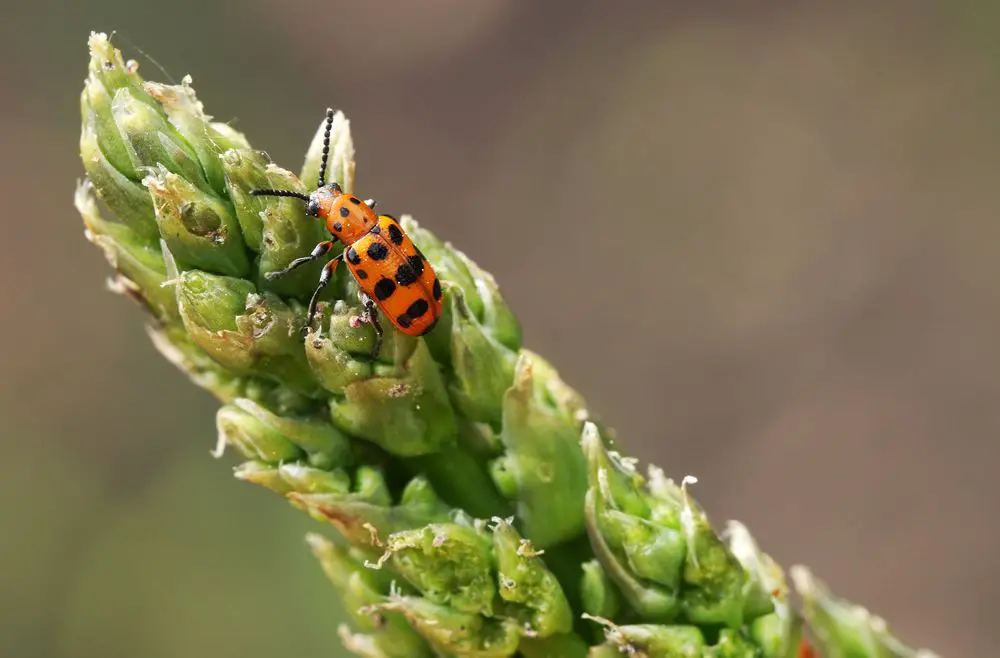
The three white or yellow spots on the backs of the 1/4-inch-long metallic blue-black pests distinguish them from one another.
In the leaves, they lay dark eggs, which hatch into light gray or brown larvae with blackheads and feet, which are then eaten by the birds.
To control the infestation, pick the Asparagus by hand and apply an insecticidal soap spray or dust to the severely infested plants.
Aside from the Asparagus beetle, which is reddish-brown with six black spots on each wing cover, these methods also control the 12-spotted Asparagus beetle.
An additional pest that feeds on foliage is the Asparagus miner, which creates zig-zag tunnels in the stalks of Asparagus plants.
If your Asparagus bed does become infected by disease organisms, your best option is to start over in a different part of the garden with plants that have been newly purchased or grown.
The frost may have damaged young spears, causing them to turn brown and become soft or withered. When freezing nights are predicted, cover spears with mulch or newspaper.
Harvesting and Storing Asparagus
The temptation to grab Asparagus spears as soon as they appear may be strong when you see them coming. Some situations require you to hold off until the appropriate moment arrives.
Find out how to harvest your delicious spears, when to allow them to grow unchecked, and how to store some for later in the year by continuing to read this article!
Harvesting By Hand
In the first year of growing Asparagus from seed, the emphasis should be on root development rather than spear production. It is also important to avoid harvesting spears during the second year, which is when plants are developing.
In the third year, you can harvest some for two to four weeks, and you should stop when the new spears are no wider than the width of a pencil. Following that, you will be able to harvest for up to eight weeks per year.
You’ll need to wait a year before harvesting Asparagus from transplanted crowns and you can’t harvest Asparagus until the second year after you have planted it.
Harvest is only available for two to four weeks during the second year of the experiment.
This ensures that the plant gets the best possible start, resulting in more abundant harvests in the subsequent years of its lifecycle.
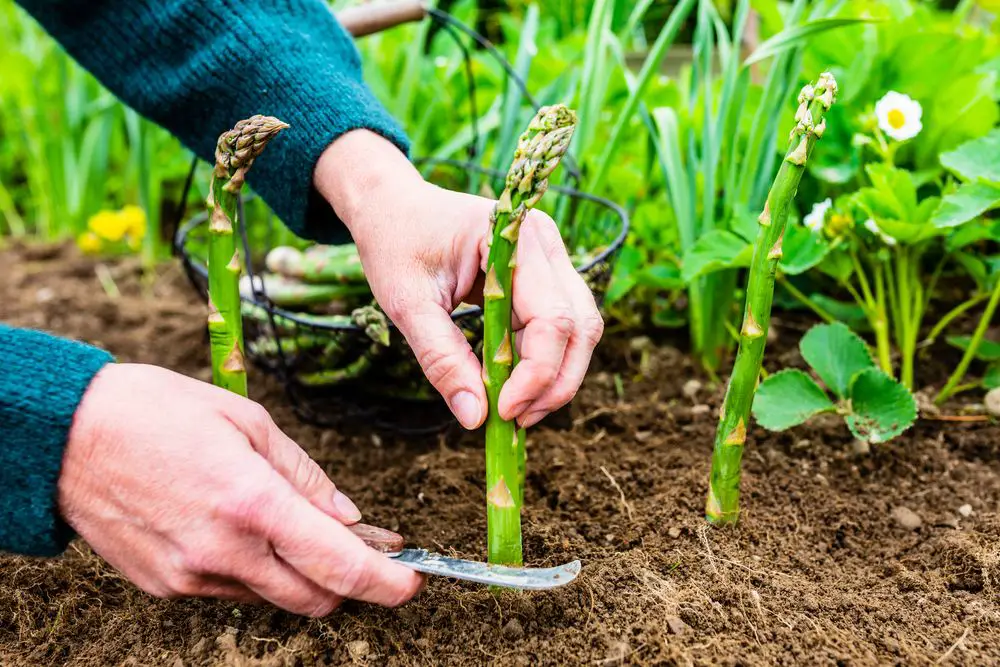
A small vegetable knife can be used to harvest Asparagus spears. They are cut off with the spear still attached.
Growing these just below the soil’s surface is preferred by some growers. Avoid cutting any other spears that may be forming beneath the soil’s surface if you choose to go this route.
Cuts just above the soil are our preferred method. Another option is to simply grasp the spear and bend it slightly, allowing it to snap off just above the soil surface.
At the time of harvest, your spears should be between 6 and 9 inches in length. When they’re shorter, you can harvest them, but the number of Asparagus spears you’ll get will be reduced. It’s important to harvest them before the tips begin to spread.
If the Asparagus spear’s tip has begun to open, it has already begun to turn woody and will be unpalatable to consume as a result.
You should continue to harvest those spears during your harvest period, but you should most likely compost them after harvesting is completed.
To keep up with the quick growth of Asparagus, you will need to collect spears every day or every other day for the whole season.
Ensure that you collect all spears of an acceptable size at every harvest, and you’ll enjoy a consistent supply for up to eight weeks!
Storing Asparagus

A lot of people enjoy fresh-picked Asparagus right out of the garden, but if you have many Asparagus plants, you may find yourself needing to freeze a fair number of them for later use.
Learn how to accomplish this in your refrigerator, freezer, and pantry shelves by following the steps outlined below.
Keeping the Asparagus in the Refrigerator
Taking your fresh Asparagus and rubber banding it together in a bunch will suffice for short-term preservation. Pour approximately an inch of water into a mason jar and place the chopped or snapped-off ends in there.
To protect the jar from spilling, place a plastic bag over the rim and fasten it with a second rubber band. If the water becomes hazy, it is necessary to change it. It will survive around one week if stored in this manner.
Freezing Asparagus
Lightly blanching your Asparagus in hot water for a few seconds before freezing it will allow you to store it longer. Prepare an ice bath by bringing a big saucepan of water to a boil.
Asparagus should be cut into approximately one-inch pieces. When the water comes to a rolling boil, add the Asparagus to the saucepan and cook for another 2 minutes.
While it should only take a minute or so for your Asparagus pieces to blanch, bigger stalks might take up to a minute and a half, and smaller stalks could take less than a minute.
Using a slotted spoon, carefully remove the Asparagus from the pan and place it in the ice bath. Leave it in the cold water for at least the same length of time as you would have boiled it, then strain it through a colander and set it aside to dry naturally.
As soon as the Asparagus has dried, put it out on a sheet pan and wrap it tightly with plastic wrap. Freezing it for around an hour is recommended. The Asparagus will not stick together later because of the first flash freezing.
After that, you may place it in a container or freezer bag for long-term storage. After being frozen for nearly a year, Asparagus is still OK to use!
Asparagus In Can
Asparagus may be preserved in a variety of ways, including canning. Given the low acidity of the food, you’ll want to can it under pressure to avoid spoiling or the growth of hazardous bacterial contaminants like botulism.
It is possible to cook whole spears of Asparagus after canning them, which is an advantage.
To do so, place a clean and sanitized quart jar on its side and insert spears so that the broad end of the spears is towards the bottom of the jar’s opening. Using as many Asparagus spears as possible, fill up the jar to the brim, then put it on its side.
Optionally, add a teaspoon of salt to each quart jar; while you can omit the salt, the salt will enhance the final flavor of your salsa.
Bring the water to a boil, then pour it into the jars to fill them. Keep the spears submerged in water up to the lip of the jar, leaving an inch between the liquid’s surface and the jar’s rim to prevent them from floating away.
Apply lids and rings to the jars and process them in a pressure canner for 40 minutes at 10 pounds of pressure (or eleven pounds for a dial-gauge canner). If you reside at a high elevation, you should adjust the pressure according to the manufacturer’s guidelines.
Asparagus pickling recipes are also available on the internet. Asparagus can be pickled in a hot water bath canner rather than a pressure canner since the acidity of the pickled Asparagus is significantly increased.
Check to see that the recipe you’re using is for a canning pickle and not a refrigerator pickle before you begin!
Drying Asparagus
You can even dry your Asparagus if you want to. Blanch your Asparagus in boiling water as stated above, then immediately cool it in cold water to halt the cooking process completely.
Arrange the Asparagus on dehydrator trays once they have been drained. Set aside a tray for the thickest pieces and another for the medium-thickness portions. Set aside another tray for the tiniest bits.
Dehydrate the Asparagus according to the instructions on the package of your dehydrator until it is completely dry and can be snapped easily.
Ensure that the container is sealed and that a desiccant package is included to eliminate any remaining moisture.
To use, you may either rehydrate it by soaking it for around 15-20 minutes in water before cooking, or you can add entire dried pieces to soups or stews.
Alternatively, you can powder it and use it as a flavoring agent in other recipes, depending on your preferences.
It is also possible to enjoy dried Asparagus as a tasty crunchy snack option!
The freeze-drying method, incidentally, is equally effective with Asparagus.
For this specific preservation strategy, thinner spears appear to be more effective than thicker ones. Be sure to blanch them before using this recipe.
Final Thoughts
There you have it – the Asparagus Anthology! With all the data contained in this article you’ll become Asparagus authorities in no time!
Jenny Marie
Tribal Writer
Edited By
Patricia Godwin